


Dans ce tutoriel, nous allons vous montrer comment programmer l’ESP32 CYD (Cheap Yellow Display) à l’aide de VS Code avec l’extension PlatformIO. Nous allons vous montrer comment charger et configurer la bibliothèque TFT_eSPI, la bibliothèque XPT2046_Touchscreen et configurer la bibliothèque LVGL sur VS Code avec PlatformIO.

Nouveau sur l’écran jaune bon marché ESP32 ? Commencez ici : Premiers pas avec le panneau d’affichage jaune bon marché ESP32 – CYD (ESP32-2432S028R)
Ce tutoriel s’applique également si vous utilisez un ESP32 avec un écran tactile LCD TFT ILI9341 240 × 320 séparé de 2,8 pouces.
Conditions préalables
Avant de poursuivre ce tutoriel :
Installation de la bibliothèque XPT2046_Touchscreen sur VS Code
Pour installer la bibliothèque XPT2046_Touchscreen sur VS Code, vous devez ajouter la ligne suivante au fichier platformio.ini de votre projet en cours.
lib_deps = https://github.com/PaulStoffregen/XPT2046_Touchscreen.gitIl existe actuellement un problème dans VS Code lors du chargement de cette bibliothèque depuis l’interface Bibliothèques. Vous devez donc le charger ainsi en utilisant le lien de la bibliothèque Gihub, afin qu’il utilise la dernière version.
La plupart de vos projets utiliseront un débit de 115 200 bauds, ajoutez donc également la ligne suivante au fichier platformio.ini.
monitor_speed = 115200Installation de la bibliothèque TFT_eSPI sur VS Code
Pour installer la bibliothèque TFT_eSPI, vous pouvez cliquer sur l’icône Accueil, sélectionner l’onglet Bibliothèques à gauche, puis rechercher TFT_eSPI.

Sélectionnez le TFT_eSPI de Bodmer, puis cliquez sur Ajouter au projet. Sélectionnez le projet sur lequel vous travaillez actuellement.

Après cela, la bibliothèque sera automatiquement ajoutée à votre fichier platformio.ini. La directive lib_deps ressemblera à ceci :
lib_deps =
	https://github.com/PaulStoffregen/XPT2046_Touchscreen.git
	bodmer/TFT_eSPI@^2.5.43
Configuration de la bibliothèque TFT_eSPI sur VS Code – le fichier de configuration User_Setup.h
Pour utiliser correctement la bibliothèque TFT_eSPI, vous avez besoin d’un fichier de configuration appelé User_Setup.h avec les bonnes définitions pour le modèle d’affichage que vous utilisez.
Nous avons déjà préparé ce fichier afin que vous n’ayez aucun problème de configuration en suivant nos exemples. Suivez les instructions suivantes pour savoir comment procéder.
Remarque : nous l’avons testé sur l’ESP32-2432S028R et l’écran tactile LCD TFT ILI9341 240×320 de 2,8 pouces. Si vous disposez de différents modèles avec des tailles différentes, vous devrez probablement ajuster le fichier User_Setup.h.
1) Dans l’onglet Explorateur dans la barre latérale gauche, sous le dossier du projet, accédez à .pio > libdeps\[you_board_model] > TFT_eSPI > User_Setup.h.
2) Ouvrez le fichier User_Setup.h.

3) Remplacez le code du fichier User_Setup.h par le code fourni dans notre fichier User_Setup.h. Vous pouvez obtenir notre fichier User_Setup.h ci-dessous.
4) Enregistrez le fichier User_Setup.h.
Test de l’installation
Pour tester si vous avez installé et configuré correctement les bibliothèques, vous pouvez exécuter le code suivant sur votre carte. Il affiche du texte et teste l’écran tactile.
/*  Rui Santos & Sara Santos - Raspberryme.com
    THIS EXAMPLE WAS TESTED WITH THE FOLLOWING HARDWARE:
    1) ESP32-2432S028R 2.8 inch 240×320 also known as the Cheap Yellow Display (CYD): https://makeradvisor.com/tools/cyd-cheap-yellow-display-esp32-2432s028r/
      SET UP INSTRUCTIONS: https://Raspberryme.com/cyd/
    2) REGULAR ESP32 Dev Board + 2.8 inch 240x320 TFT Display: https://makeradvisor.com/tools/2-8-inch-ili9341-tft-240x320/ and https://makeradvisor.com/tools/esp32-dev-board-wi-fi-bluetooth/
      SET UP INSTRUCTIONS: https://Raspberryme.com/esp32-tft/
    Permission is hereby granted, free of charge, to any person obtaining a copy of this software and associated documentation files.
    The above copyright notice and this permission notice shall be included in all copies or substantial portions of the Software.
*/

#include

/*  Install the "TFT_eSPI" library by Bodmer to interface with the TFT Display - https://github.com/Bodmer/TFT_eSPI
    *** IMPORTANT: User_Setup.h available on the internet will probably NOT work with the examples available at Raspberryme.com ***
    *** YOU MUST USE THE User_Setup.h FILE PROVIDED IN THE LINK BELOW IN ORDER TO USE THE EXAMPLES FROM RANDOM NERD TUTORIALS ***
    FULL INSTRUCTIONS AVAILABLE ON HOW CONFIGURE THE LIBRARY: https://Raspberryme.com/cyd/ or https://Raspberryme.com/esp32-tft/   */
#include

// Install the "XPT2046_Touchscreen" library by Paul Stoffregen to use the Touchscreen - https://github.com/PaulStoffregen/XPT2046_Touchscreen
// Note: this library doesn't require further configuration
#include

TFT_eSPI tft = TFT_eSPI();

// Touchscreen pins
#define XPT2046_IRQ 36   // T_IRQ
#define XPT2046_MOSI 32  // T_DIN
#define XPT2046_MISO 39  // T_OUT
#define XPT2046_CLK 25   // T_CLK
#define XPT2046_CS 33    // T_CS

SPIClass touchscreenSPI = SPIClass(VSPI);
XPT2046_Touchscreen touchscreen(XPT2046_CS, XPT2046_IRQ);

#define SCREEN_WIDTH 320
#define SCREEN_HEIGHT 240
#define FONT_SIZE 2

// Touchscreen coordinates: (x, y) and pressure (z)
int x, y, z;

// Print Touchscreen info about X, Y and Pressure (Z) on the Serial Monitor
void printTouchToSerial(int touchX, int touchY, int touchZ) {
  Serial.print("X = ");
  Serial.print(touchX);
  Serial.print(" | Y = ");
  Serial.print(touchY);
  Serial.print(" | Pressure = ");
  Serial.print(touchZ);
  Serial.println();
}

// Print Touchscreen info about X, Y and Pressure (Z) on the TFT Display
void printTouchToDisplay(int touchX, int touchY, int touchZ) {
  // Clear TFT screen
  tft.fillScreen(TFT_WHITE);
  tft.setTextColor(TFT_BLACK, TFT_WHITE);

  int centerX = SCREEN_WIDTH / 2;
  int textY = 80;

  String tempText = "X = " + String(touchX);
  tft.drawCentreString(tempText, centerX, textY, FONT_SIZE);

  textY += 20;
  tempText = "Y = " + String(touchY);
  tft.drawCentreString(tempText, centerX, textY, FONT_SIZE);

  textY += 20;
  tempText = "Pressure = " + String(touchZ);
  tft.drawCentreString(tempText, centerX, textY, FONT_SIZE);
}

void setup() {
  Serial.begin(115200);

  // Start the SPI for the touchscreen and init the touchscreen
  touchscreenSPI.begin(XPT2046_CLK, XPT2046_MISO, XPT2046_MOSI, XPT2046_CS);
  touchscreen.begin(touchscreenSPI);
  // Set the Touchscreen rotation in landscape mode
  // Note: in some displays, the touchscreen might be upside down, so you might need to set the rotation to 3: touchscreen.setRotation(3);
  touchscreen.setRotation(1);

  // Start the tft display
  tft.init();
  // Set the TFT display rotation in landscape mode
  tft.setRotation(1);

  // Clear the screen before writing to it
  tft.fillScreen(TFT_WHITE);
  tft.setTextColor(TFT_BLACK, TFT_WHITE);

  // Set X and Y coordinates for center of display
  int centerX = SCREEN_WIDTH / 2;
  int centerY = SCREEN_HEIGHT / 2;

  tft.drawCentreString("Hello, world!", centerX, 30, FONT_SIZE);
  tft.drawCentreString("Touch screen to test", centerX, centerY, FONT_SIZE);
}

void loop() {
  // Checks if Touchscreen was touched, and prints X, Y and Pressure (Z) info on the TFT display and Serial Monitor
  if (touchscreen.tirqTouched() && touchscreen.touched()) {
    // Get Touchscreen points
    TS_Point p = touchscreen.getPoint();
    // Calibrate Touchscreen points with map function to the correct width and height
    x = map(p.x, 200, 3700, 1, SCREEN_WIDTH);
    y = map(p.y, 240, 3800, 1, SCREEN_HEIGHT);
    z = p.z;

    printTouchToSerial(x, y, z);
    printTouchToDisplay(x, y, z);

    delay(100);
  }
}
Afficher le code brut
Démonstration
Téléchargez le code sur votre tableau.
Après avoir téléchargé le code sur votre tableau, il devrait afficher l’exemple « Hello, world ! » texte centré en haut. Appuyez sur l’écran tactile avec votre doigt pour le tester. Il doit imprimer les coordonnées : (x, y) et la pression (z) sur l’écran TFT.

Remarque importante : vous devez effectuer toute la procédure d’installation et configurer le fichier de configuration pour chaque nouveau projet dans VS Code. Vous devrez également répéter cette opération si vous mettez à jour les bibliothèques de votre projet.
Installation et configuration de la bibliothèque LVGL dans VS Code
1) Après avoir créé ou ouvert un projet dans VS Code, cliquez sur l’icône Accueil et sélectionnez l’onglet Bibliothèques. Recherchez LVGL.

2) Ajoutez LVGL version 9 à votre projet.
3) Dans la barre latérale gauche, ouvrez l’onglet Explorateur. Suivez le chemin suivant .pio > libdeps.
4) Créez un nouveau fichier sous le dossier libdeps appelé lv_conf.h.
5) Ajoutez le code suivant au fichier lv_conf.h.

6) Ensuite, ouvrez le dossier lvgl. Déplacez les dossiers démos et exemples vers le dossier src.

Maintenant, vous avez tout configuré pour utiliser la bibliothèque LVGL dans VS Code.
Pour utiliser la bibliothèque LVGL, vous devez également installer les bibliothèques TFT_eSPI et XPT2046_Touchscreen comme mentionné précédemment.
Remarque importante : vous devez effectuer toute la procédure d’installation et configurer les fichiers de configuration pour chaque nouveau projet dans VS Code.
Pour tester si toutes les bibliothèques ont été correctement configurées, vous pouvez tester le code suivant.
/*  Rui Santos & Sara Santos - Raspberryme.com
    THIS EXAMPLE WAS TESTED WITH THE FOLLOWING HARDWARE:
    1) ESP32-2432S028R 2.8 inch 240×320 also known as the Cheap Yellow Display (CYD): https://makeradvisor.com/tools/cyd-cheap-yellow-display-esp32-2432s028r/
      SET UP INSTRUCTIONS: https://Raspberryme.com/cyd-lvgl/
    2) REGULAR ESP32 Dev Board + 2.8 inch 240x320 TFT Display: https://makeradvisor.com/tools/2-8-inch-ili9341-tft-240x320/ and https://makeradvisor.com/tools/esp32-dev-board-wi-fi-bluetooth/
      SET UP INSTRUCTIONS: https://Raspberryme.com/esp32-tft-lvgl/
    Permission is hereby granted, free of charge, to any person obtaining a copy of this software and associated documentation files.
    The above copyright notice and this permission notice shall be included in all copies or substantial portions of the Software.
*/

/*  Install the "lvgl" library version 9.2 by kisvegabor to interface with the TFT Display - https://lvgl.io/
    *** IMPORTANT: lv_conf.h available on the internet will probably NOT work with the examples available at Raspberryme.com ***
    *** YOU MUST USE THE lv_conf.h FILE PROVIDED IN THE LINK BELOW IN ORDER TO USE THE EXAMPLES FROM RANDOM NERD TUTORIALS ***
    FULL INSTRUCTIONS AVAILABLE ON HOW CONFIGURE THE LIBRARY: https://Raspberryme.com/cyd-lvgl/ or https://Raspberryme.com/esp32-tft-lvgl/   */
#include

/*  Install the "TFT_eSPI" library by Bodmer to interface with the TFT Display - https://github.com/Bodmer/TFT_eSPI
    *** IMPORTANT: User_Setup.h available on the internet will probably NOT work with the examples available at Raspberryme.com ***
    *** YOU MUST USE THE User_Setup.h FILE PROVIDED IN THE LINK BELOW IN ORDER TO USE THE EXAMPLES FROM RANDOM NERD TUTORIALS ***
    FULL INSTRUCTIONS AVAILABLE ON HOW CONFIGURE THE LIBRARY: https://Raspberryme.com/cyd-lvgl/ or https://Raspberryme.com/esp32-tft-lvgl/   */
#include

// Install the "XPT2046_Touchscreen" library by Paul Stoffregen to use the Touchscreen - https://github.com/PaulStoffregen/XPT2046_Touchscreen - Note: this library doesn't require further configuration
#include

// Touchscreen pins
#define XPT2046_IRQ 36   // T_IRQ
#define XPT2046_MOSI 32  // T_DIN
#define XPT2046_MISO 39  // T_OUT
#define XPT2046_CLK 25   // T_CLK
#define XPT2046_CS 33    // T_CS

SPIClass touchscreenSPI = SPIClass(VSPI);
XPT2046_Touchscreen touchscreen(XPT2046_CS, XPT2046_IRQ);

#define SCREEN_WIDTH 240
#define SCREEN_HEIGHT 320

// Touchscreen coordinates: (x, y) and pressure (z)
int x, y, z;

#define DRAW_BUF_SIZE (SCREEN_WIDTH * SCREEN_HEIGHT / 10 * (LV_COLOR_DEPTH / 8))
uint32_t draw_buf[DRAW_BUF_SIZE / 4];

// If logging is enabled, it will inform the user about what is happening in the library
void log_print(lv_log_level_t level, const char * buf) {
  LV_UNUSED(level);
  Serial.println(buf);
  Serial.flush();
}

// Get the Touchscreen data
void touchscreen_read(lv_indev_t * indev, lv_indev_data_t * data) {
  // Checks if Touchscreen was touched, and prints X, Y and Pressure (Z)
  if(touchscreen.tirqTouched() && touchscreen.touched()) {
    // Get Touchscreen points
    TS_Point p = touchscreen.getPoint();
    // Calibrate Touchscreen points with map function to the correct width and height
    x = map(p.x, 200, 3700, 1, SCREEN_WIDTH);
    y = map(p.y, 240, 3800, 1, SCREEN_HEIGHT);
    z = p.z;

    data->state = LV_INDEV_STATE_PRESSED;

    // Set the coordinates
    data->point.x = x;
    data->point.y = y;

    // Print Touchscreen info about X, Y and Pressure (Z) on the Serial Monitor
    /* Serial.print("X = ");
    Serial.print(x);
    Serial.print(" | Y = ");
    Serial.print(y);
    Serial.print(" | Pressure = ");
    Serial.print(z);
    Serial.println();*/
  }
  else {
    data->state = LV_INDEV_STATE_RELEASED;
  }
}

int btn1_count = 0;
// Callback that is triggered when btn1 is clicked
static void event_handler_btn1(lv_event_t * e) {
  lv_event_code_t code = lv_event_get_code(e);
  if(code == LV_EVENT_CLICKED) {
    btn1_count++;
    LV_LOG_USER("Button clicked %d", (int)btn1_count);
  }
}

// Callback that is triggered when btn2 is clicked/toggled
static void event_handler_btn2(lv_event_t * e) {
  lv_event_code_t code = lv_event_get_code(e);
  lv_obj_t * obj = (lv_obj_t*) lv_event_get_target(e);
  if(code == LV_EVENT_VALUE_CHANGED) {
    LV_UNUSED(obj);
    LV_LOG_USER("Toggled %s", lv_obj_has_state(obj, LV_STATE_CHECKED) ? "on" : "off");
  }
}

static lv_obj_t * slider_label;
// Callback that prints the current slider value on the TFT display and Serial Monitor for debugging purposes
static void slider_event_callback(lv_event_t * e) {
  lv_obj_t * slider = (lv_obj_t*) lv_event_get_target(e);
  char buf[8];
  lv_snprintf(buf, sizeof(buf), "%d%%", (int)lv_slider_get_value(slider));
  lv_label_set_text(slider_label, buf);
  lv_obj_align_to(slider_label, slider, LV_ALIGN_OUT_BOTTOM_MID, 0, 10);
  LV_LOG_USER("Slider changed to %d%%", (int)lv_slider_get_value(slider));
}

void lv_create_main_gui(void) {
  // Create a text label aligned center on top ("Hello, world!")
  lv_obj_t * text_label = lv_label_create(lv_screen_active());
  lv_label_set_long_mode(text_label, LV_LABEL_LONG_WRAP);    // Breaks the long lines
  lv_label_set_text(text_label, "Hello, world!");
  lv_obj_set_width(text_label, 150);    // Set smaller width to make the lines wrap
  lv_obj_set_style_text_align(text_label, LV_TEXT_ALIGN_CENTER, 0);
  lv_obj_align(text_label, LV_ALIGN_CENTER, 0, -90);

  lv_obj_t * btn_label;
  // Create a Button (btn1)
  lv_obj_t * btn1 = lv_button_create(lv_screen_active());
  lv_obj_add_event_cb(btn1, event_handler_btn1, LV_EVENT_ALL, NULL);
  lv_obj_align(btn1, LV_ALIGN_CENTER, 0, -50);
  lv_obj_remove_flag(btn1, LV_OBJ_FLAG_PRESS_LOCK);

  btn_label = lv_label_create(btn1);
  lv_label_set_text(btn_label, "Button");
  lv_obj_center(btn_label);

  // Create a Toggle button (btn2)
  lv_obj_t * btn2 = lv_button_create(lv_screen_active());
  lv_obj_add_event_cb(btn2, event_handler_btn2, LV_EVENT_ALL, NULL);
  lv_obj_align(btn2, LV_ALIGN_CENTER, 0, 10);
  lv_obj_add_flag(btn2, LV_OBJ_FLAG_CHECKABLE);
  lv_obj_set_height(btn2, LV_SIZE_CONTENT);

  btn_label = lv_label_create(btn2);
  lv_label_set_text(btn_label, "Toggle");
  lv_obj_center(btn_label);

  // Create a slider aligned in the center bottom of the TFT display
  lv_obj_t * slider = lv_slider_create(lv_screen_active());
  lv_obj_align(slider, LV_ALIGN_CENTER, 0, 60);
  lv_obj_add_event_cb(slider, slider_event_callback, LV_EVENT_VALUE_CHANGED, NULL);
  lv_slider_set_range(slider, 0, 100);
  lv_obj_set_style_anim_duration(slider, 2000, 0);

  // Create a label below the slider to display the current slider value
  slider_label = lv_label_create(lv_screen_active());
  lv_label_set_text(slider_label, "0%");
  lv_obj_align_to(slider_label, slider, LV_ALIGN_OUT_BOTTOM_MID, 0, 10);
}

void setup() {
  String LVGL_Arduino = String("LVGL Library Version: ") + lv_version_major() + "." + lv_version_minor() + "." + lv_version_patch();
  Serial.begin(115200);
  Serial.println(LVGL_Arduino);

  // Start LVGL
  lv_init();
  // Register print function for debugging
  lv_log_register_print_cb(log_print);

  // Start the SPI for the touchscreen and init the touchscreen
  touchscreenSPI.begin(XPT2046_CLK, XPT2046_MISO, XPT2046_MOSI, XPT2046_CS);
  touchscreen.begin(touchscreenSPI);
  // Set the Touchscreen rotation in landscape mode
  // Note: in some displays, the touchscreen might be upside down, so you might need to set the rotation to 0: touchscreen.setRotation(0);
  touchscreen.setRotation(2);

  // Create a display object
  lv_display_t * disp;
  // Initialize the TFT display using the TFT_eSPI library
  disp = lv_tft_espi_create(SCREEN_WIDTH, SCREEN_HEIGHT, draw_buf, sizeof(draw_buf));
  lv_display_set_rotation(disp, LV_DISPLAY_ROTATION_270);

  // Initialize an LVGL input device object (Touchscreen)
  lv_indev_t * indev = lv_indev_create();
  lv_indev_set_type(indev, LV_INDEV_TYPE_POINTER);
  // Set the callback function to read Touchscreen input
  lv_indev_set_read_cb(indev, touchscreen_read);

  // Function to draw the GUI (text, buttons and sliders)
  lv_create_main_gui();
}

void loop() {
  lv_task_handler();  // let the GUI do its work
  lv_tick_inc(5);     // tell LVGL how much time has passed
  delay(5);           // let this time pass
}
Afficher le code brut
Test de l’installation
Téléchargez le code sur votre tableau.
Après avoir téléchargé le code sur votre tableau, il devrait afficher l’exemple « Hello, world ! » texte centré en haut, deux boutons et un curseur.

Interagissez avec les widgets et voyez les résultats dans Serial Monitor. Si l’exemple fonctionne comme prévu, toutes les bibliothèques ont été ajoutées et configurées avec succès.
Conclusion
Dans ce rapide didacticiel, nous vous avons montré comment configurer les bibliothèques TFT, écran tactile et LVGL sur VS Code pour programmer l’écran ESP32 CYD.
Nous espérons que vous avez trouvé ce guide utile. Si vous avez une approche meilleure ou différente pour configurer les bibliothèques, veuillez la partager ci-dessous.
Autres projets qui pourraient vous plaire :
Apprenez-en davantage sur la création d’interfaces graphiques à l’aide de LVGL avec notre eBook :
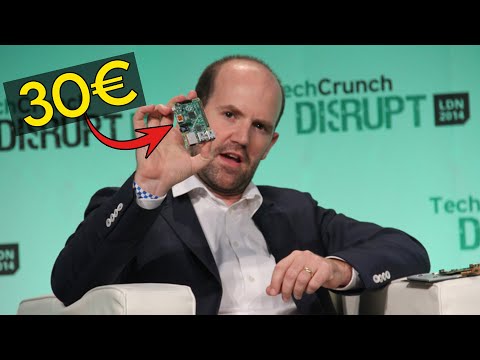
Cette vidéo vous emmène dans l’histoire de Raspberry Pi :
-
 Freenove Bitcoin Miner Solo Lottery Miner, ESP32 CYD 2.8" Touch Display 240x320 Pixel TN Screen ILI9341 Driver, Dual-Core 32-bit 240 MHz Microcontroller WiFi+BT Programmable, Code Tutorial
 -
 Freenove ESP32 Affichage CYD Tactile 2.8 Pouces 240x320 Pixels TN 7789