 1")
Dans ce guide, vous apprendrez comment démarrer avec l’écran jaune bon marché ESP32 (et autres écrans compatibles) à l’aide de MicroPython. Nous présenterons rapidement la carte et expliquerons comment télécharger les bonnes bibliothèques, comment afficher du texte et des images statiques et contrôler les LED RVB et la LDR (résistance dépendante de la lumière) intégrées.
 2")
Si vous disposez d’un écran tactile TFT autonome de 2,8 pouces avec pilote ILI9341, vous pouvez lire notre guide LVGL pour l’ESP32.
Table des matières:
Dans ce guide, nous aborderons les sujets suivants :
Conditions préalables
Pour suivre ce tutoriel, vous devez installer le firmware MicroPython sur votre carte ESP32 CYD. Vous avez également besoin d’un IDE pour écrire et télécharger le code sur votre tableau. Nous vous suggérons d’utiliser Thonny IDE :
En savoir plus sur MicroPython : Programmation MicroPython avec ESP32 et ESP8266
Présentation de l’écran jaune bon marché ESP32 – CYD (ESP32-2432S028R)
La carte de développement ESP32-2432S028R est connue dans la communauté des fabricants sous le nom de « Cheap Yellow Display » ou CYD en abrégé. Cette carte de développement, dont la puce principale est un module ESP32-WROOM-32, est livrée avec un écran tactile LCD TFT de 2,8 pouces, une interface de carte microSD, une LED RVB et tous les circuits nécessaires pour programmer et alimenter la carte.
 3")
Il s’agit d’une carte très polyvalente pour créer des interfaces graphiques pour vos projets IoT et elle est beaucoup plus pratique que d’utiliser une carte ESP32 séparée avec un écran TFT.
 4")
Contenu connexe : Premiers pas avec la carte d’affichage jaune bon marché ESP32 – CYD (ESP32-2432S028R) à l’aide de l’IDE Arduino
Voici une liste de spécifications plus détaillées de cette carte de développement :
- MCU double cœur, fonctions WI-FI et Bluetooth intégrées
- La fréquence peut atteindre 240 MHz
- 520 Ko de SRAM, 448 Ko de ROM, la taille du flash est de 4 Mo
- Taille du module 50,0 × 86,0 mm
- Tension de fonctionnement : 5 V
- Consommation électrique : environ 115 mA
- Poids du produit : environ 50g
- Le module comprend :
- Écran d’affichage TFT couleur de 2,8 pouces avec puce pilote ILI9341
- Résolution d’affichage : 240x320px avec écran tactile résistif
- Circuit de contrôle du rétroéclairage
- Interface de carte TF pour stockage externe
- Interface série
- Interface de capteur de température et d’humidité (interface DHT11) et interface de port IO réservé
- Il peut être programmé avec : Arduino IDE, MicroPython, ESP-IDF
Dans les connecteurs GPIO étendus, il y a au moins 4 GPIO disponibles : GPIO 35, GPIO 22, GPIO 21 et GPIO 27. Il dispose également des broches TX/RX disponibles (voir image précédente).
Plus d’informations sur les GPIO de la carte CYD : Brochage de l’écran jaune bon marché ESP32 (CYD) (ESP32-2432S028R).
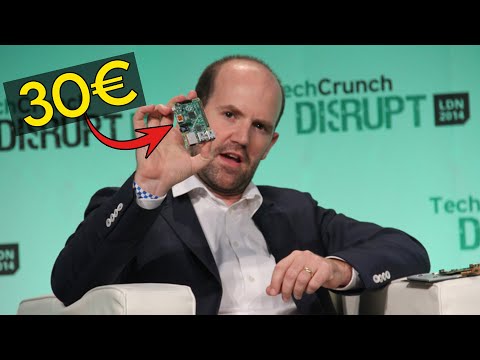
Où acheter ?
Vous pouvez cliquer sur le lien ci-dessous pour vérifier où acheter l’écran ESP32 Cheap Yellow et son prix dans différents magasins.
Bibliothèque MicroPython ILI9341
Il existe différentes bibliothèques qui facilitent la communication avec la carte CYD. Pour le micrologiciel MicroPython, nous utiliserons les pilotes d’écran MicroPython ILI9341 et d’écran tactile XPT2046 développés par l’utilisateur rdagger de GitHub. Vous devez suivre les étapes suivantes pour installer les trois modules requis.
Téléchargez et téléchargez le ili9341.py
- Cliquez ici pour télécharger le code ili9341.py ;
- Copiez le code dans un fichier sur Thonny IDE ;
- Allez dans Fichier > Enregistrer sous… et sélectionnez Périphérique MicroPython ;
- Enregistrez le fichier sous le nom ili9341.py (ne changez pas le nom).
"""ILI9341 LCD/Touch module."""
from time import sleep
from math import cos, sin, pi, radians
from sys import implementation
from framebuf import FrameBuffer, RGB565 # type: ignore
from micropython import const # type: ignore
def color565(r, g, b):
"""Return RGB565 color value.
Args:
r (int): Red value.
g (int): Green value.
b (int): Blue value.
"""
return (r & 0xf8) << 8 | (g & 0xfc) << 3 | b >> 3
class Display(object):
"""Serial interface for 16-bit color (5-6-5 RGB) IL9341 display.
Note: All coordinates are zero based.
"""
# Command constants from ILI9341 datasheet
NOP = const(0x00) # No-op
SWRESET = const(0x01) # Software reset
RDDID = const(0x04) # Read display ID info
RDDST = const(0x09) # Read display status
SLPIN = const(0x10) # Enter sleep mode
SLPOUT = const(0x11) # Exit sleep mode
PTLON = const(0x12) # Partial mode on
NORON = const(0x13) # Normal display mode on
RDMODE = const(0x0A) # Read display power mode
RDMADCTL = const(0x0B) # Read display MADCTL
RDPIXFMT = const(0x0C) # Read display pixel format
RDIMGFMT = const(0x0D) # Read display image format
RDSELFDIAG = const(0x0F) # Read display self-diagnostic
INVOFF = const(0x20) # Display inversion off
INVON = const(0x21) # Display inversion on
GAMMASET = const(0x26) # Gamma set
DISPLAY_OFF = const(0x28) # Display off
DISPLAY_ON = const(0x29) # Display on
SET_COLUMN = const(0x2A) # Column address set
SET_PAGE = const(0x2B) # Page address set
WRITE_RAM = const(0x2C) # Memory write
READ_RAM = const(0x2E) # Memory read
PTLAR = const(0x30) # Partial area
VSCRDEF = const(0x33) # Vertical scrolling definition
MADCTL = const(0x36) # Memory access control
VSCRSADD = const(0x37) # Vertical scrolling start address
PIXFMT = const(0x3A) # COLMOD: Pixel format set
WRITE_DISPLAY_BRIGHTNESS = const(0x51) # Brightness hardware dependent!
READ_DISPLAY_BRIGHTNESS = const(0x52)
WRITE_CTRL_DISPLAY = const(0x53)
READ_CTRL_DISPLAY = const(0x54)
WRITE_CABC = const(0x55) # Write Content Adaptive Brightness Control
READ_CABC = const(0x56) # Read Content Adaptive Brightness Control
WRITE_CABC_MINIMUM = const(0x5E) # Write CABC Minimum Brightness
READ_CABC_MINIMUM = const(0x5F) # Read CABC Minimum Brightness
FRMCTR1 = const(0xB1) # Frame rate control (In normal mode/full colors)
FRMCTR2 = const(0xB2) # Frame rate control (In idle mode/8 colors)
FRMCTR3 = const(0xB3) # Frame rate control (In partial mode/full colors)
INVCTR = const(0xB4) # Display inversion control
DFUNCTR = const(0xB6) # Display function control
PWCTR1 = const(0xC0) # Power control 1
PWCTR2 = const(0xC1) # Power control 2
PWCTRA = const(0xCB) # Power control A
PWCTRB = const(0xCF) # Power control B
VMCTR1 = const(0xC5) # VCOM control 1
VMCTR2 = const(0xC7) # VCOM control 2
RDID1 = const(0xDA) # Read ID 1
RDID2 = const(0xDB) # Read ID 2
RDID3 = const(0xDC) # Read ID 3
RDID4 = const(0xDD) # Read ID 4
GMCTRP1 = const(0xE0) # Positive gamma correction
GMCTRN1 = const(0xE1) # Negative gamma correction
DTCA = const(0xE8) # Driver timing control A
DTCB = const(0xEA) # Driver timing control B
POSC = const(0xED) # Power on sequence control
ENABLE3G = const(0xF2) # Enable 3 gamma control
PUMPRC = const(0xF7) # Pump ratio control
MIRROR_ROTATE = { # MADCTL configurations for rotation and mirroring
(False, 0): 0x80, # 1000 0000
(False, 90): 0xE0, # 1110 0000
(False, 180): 0x40, # 0100 0000
(False, 270): 0x20, # 0010 0000
(True, 0): 0xC0, # 1100 0000
(True, 90): 0x60, # 0110 0000
(True, 180): 0x00, # 0000 0000
(True, 270): 0xA0 # 1010 0000
}
def __init__(self, spi, cs, dc, rst, width=240, height=320, rotation=0,
mirror=False, bgr=True, gamma=True):
"""Initialize OLED.
Args:
spi (Class Spi): SPI interface for OLED
cs (Class Pin): Chip select pin
dc (Class Pin): Data/Command pin
rst (Class Pin): Reset pin
width (Optional int): Screen width (default 240)
height (Optional int): Screen height (default 320)
rotation (Optional int): Rotation must be 0 default, 90. 180 or 270
mirror (Optional bool): Mirror display (default False)
bgr (Optional bool): Swaps red and blue colors (default True)
gamma (Optional bool): Custom gamma correction (default True)
"""
self.spi = spi
self.cs = cs
self.dc = dc
self.rst = rst
self.width = width
self.height = height
if (mirror, rotation) not in self.MIRROR_ROTATE:
raise ValueError('Rotation must be 0, 90, 180 or 270.')
else:
self.rotation = self.MIRROR_ROTATE[mirror, rotation]
if bgr: # Set BGR bit
self.rotation |= 0b00001000
# Initialize GPIO pins and set implementation specific methods
if implementation.name == 'circuitpython':
self.cs.switch_to_output(value=True)
self.dc.switch_to_output(value=False)
self.rst.switch_to_output(value=True)
self.reset = self.reset_cpy
self.write_cmd = self.write_cmd_cpy
self.write_data = self.write_data_cpy
else:
self.cs.init(self.cs.OUT, value=1)
self.dc.init(self.dc.OUT, value=0)
self.rst.init(self.rst.OUT, value=1)
self.reset = self.reset_mpy
self.write_cmd = self.write_cmd_mpy
self.write_data = self.write_data_mpy
self.reset()
# Send initialization commands
self.write_cmd(self.SWRESET) # Software reset
sleep(.1)
self.write_cmd(self.PWCTRB, 0x00, 0xC1, 0x30) # Pwr ctrl B
self.write_cmd(self.POSC, 0x64, 0x03, 0x12, 0x81) # Pwr on seq. ctrl
self.write_cmd(self.DTCA, 0x85, 0x00, 0x78) # Driver timing ctrl A
self.write_cmd(self.PWCTRA, 0x39, 0x2C, 0x00, 0x34, 0x02) # Pwr ctrl A
self.write_cmd(self.PUMPRC, 0x20) # Pump ratio control
self.write_cmd(self.DTCB, 0x00, 0x00) # Driver timing ctrl B
self.write_cmd(self.PWCTR1, 0x23) # Pwr ctrl 1
self.write_cmd(self.PWCTR2, 0x10) # Pwr ctrl 2
self.write_cmd(self.VMCTR1, 0x3E, 0x28) # VCOM ctrl 1
self.write_cmd(self.VMCTR2, 0x86) # VCOM ctrl 2
self.write_cmd(self.MADCTL, self.rotation) # Memory access ctrl
self.write_cmd(self.VSCRSADD, 0x00) # Vertical scrolling start address
self.write_cmd(self.PIXFMT, 0x55) # COLMOD: Pixel format
self.write_cmd(self.FRMCTR1, 0x00, 0x18) # Frame rate ctrl
self.write_cmd(self.DFUNCTR, 0x08, 0x82, 0x27)
self.write_cmd(self.ENABLE3G, 0x00) # Enable 3 gamma ctrl
self.write_cmd(self.GAMMASET, 0x01) # Gamma curve selected
if gamma: # Use custom gamma correction values
self.write_cmd(self.GMCTRP1, 0x0F, 0x31, 0x2B, 0x0C, 0x0E, 0x08,
0x4E, 0xF1, 0x37, 0x07, 0x10, 0x03, 0x0E, 0x09,
0x00)
self.write_cmd(self.GMCTRN1, 0x00, 0x0E, 0x14, 0x03, 0x11, 0x07,
0x31, 0xC1, 0x48, 0x08, 0x0F, 0x0C, 0x31, 0x36,
0x0F)
self.write_cmd(self.SLPOUT) # Exit sleep
sleep(.1)
self.write_cmd(self.DISPLAY_ON) # Display on
sleep(.1)
self.clear()
def block(self, x0, y0, x1, y1, data):
"""Write a block of data to display.
Args:
x0 (int): Starting X position.
y0 (int): Starting Y position.
x1 (int): Ending X position.
y1 (int): Ending Y position.
data (bytes): Data buffer to write.
"""
self.write_cmd(self.SET_COLUMN,
x0 >> 8, x0 & 0xff, x1 >> 8, x1 & 0xff)
self.write_cmd(self.SET_PAGE,
y0 >> 8, y0 & 0xff, y1 >> 8, y1 & 0xff)
self.write_cmd(self.WRITE_RAM)
self.write_data(data)
def cleanup(self):
"""Clean up resources."""
self.clear()
self.display_off()
self.spi.deinit()
print('display off')
def clear(self, color=0, hlines=8):
"""Clear display.
Args:
color (Optional int): RGB565 color value (Default: 0 = Black).
hlines (Optional int): # of horizontal lines per chunk (Default: 8)
Note:
hlines was introduced to deal with memory allocation on some
boards. Smaller values allocate less memory but take longer
to execute. hlines must be a factor of the display height.
For example, for a 240 pixel height, valid values for hline
would be 1, 2, 3, 4, 5, 6, 8, 10, 12, 15, 16, 20, 24, 30, 40, etc.
Higher values may result in memory allocation errors.
"""
w = self.width
h = self.height
assert hlines > 0 and h % hlines == 0, (
"hlines must be a non-zero factor of height.")
# Clear display
if color:
line = color.to_bytes(2, 'big') * (w * hlines)
else:
line = bytearray(w * 2 * hlines)
for y in range(0, h, hlines):
self.block(0, y, w - 1, y + hlines - 1, line)
def display_off(self):
"""Turn display off."""
self.write_cmd(self.DISPLAY_OFF)
def display_on(self):
"""Turn display on."""
self.write_cmd(self.DISPLAY_ON)
def draw_circle(self, x0, y0, r, color):
"""Draw a circle.
Args:
x0 (int): X coordinate of center point.
y0 (int): Y coordinate of center point.
r (int): Radius.
color (int): RGB565 color value.
"""
f = 1 - r
dx = 1
dy = -r - r
x = 0
y = r
self.draw_pixel(x0, y0 + r, color)
self.draw_pixel(x0, y0 - r, color)
self.draw_pixel(x0 + r, y0, color)
self.draw_pixel(x0 - r, y0, color)
while x < y:
if f >= 0:
y -= 1
dy += 2
f += dy
x += 1
dx += 2
f += dx
self.draw_pixel(x0 + x, y0 + y, color)
self.draw_pixel(x0 - x, y0 + y, color)
self.draw_pixel(x0 + x, y0 - y, color)
self.draw_pixel(x0 - x, y0 - y, color)
self.draw_pixel(x0 + y, y0 + x, color)
self.draw_pixel(x0 - y, y0 + x, color)
self.draw_pixel(x0 + y, y0 - x, color)
self.draw_pixel(x0 - y, y0 - x, color)
def draw_ellipse(self, x0, y0, a, b, color):
"""Draw an ellipse.
Args:
x0, y0 (int): Coordinates of center point.
a (int): Semi axis horizontal.
b (int): Semi axis vertical.
color (int): RGB565 color value.
Note:
The center point is the center of the x0,y0 pixel.
Since pixels are not divisible, the axes are integer rounded
up to complete on a full pixel. Therefore the major and
minor axes are increased by 1.
"""
a2 = a * a
b2 = b * b
twoa2 = a2 + a2
twob2 = b2 + b2
x = 0
y = b
px = 0
py = twoa2 * y
# Plot initial points
self.draw_pixel(x0 + x, y0 + y, color)
self.draw_pixel(x0 - x, y0 + y, color)
self.draw_pixel(x0 + x, y0 - y, color)
self.draw_pixel(x0 - x, y0 - y, color)
# Region 1
p = round(b2 - (a2 * b) + (0.25 * a2))
while px < py:
x += 1
px += twob2
if p < 0:
p += b2 + px
else:
y -= 1
py -= twoa2
p += b2 + px - py
self.draw_pixel(x0 + x, y0 + y, color)
self.draw_pixel(x0 - x, y0 + y, color)
self.draw_pixel(x0 + x, y0 - y, color)
self.draw_pixel(x0 - x, y0 - y, color)
# Region 2
p = round(b2 * (x + 0.5) * (x + 0.5) +
a2 * (y - 1) * (y - 1) - a2 * b2)
while y > 0:
y -= 1
py -= twoa2
if p > 0:
p += a2 - py
else:
x += 1
px += twob2
p += a2 - py + px
self.draw_pixel(x0 + x, y0 + y, color)
self.draw_pixel(x0 - x, y0 + y, color)
self.draw_pixel(x0 + x, y0 - y, color)
self.draw_pixel(x0 - x, y0 - y, color)
def draw_hline(self, x, y, w, color):
"""Draw a horizontal line.
Args:
x (int): Starting X position.
y (int): Starting Y position.
w (int): Width of line.
color (int): RGB565 color value.
"""
if self.is_off_grid(x, y, x + w - 1, y):
return
line = color.to_bytes(2, 'big') * w
self.block(x, y, x + w - 1, y, line)
def draw_image(self, path, x=0, y=0, w=320, h=240):
"""Draw image from flash.
Args:
path (string): Image file path.
x (int): X coordinate of image left. Default is 0.
y (int): Y coordinate of image top. Default is 0.
w (int): Width of image. Default is 320.
h (int): Height of image. Default is 240.
"""
x2 = x + w - 1
y2 = y + h - 1
if self.is_off_grid(x, y, x2, y2):
return
with open(path, "rb") as f:
chunk_height = 1024 // w
chunk_count, remainder = divmod(h, chunk_height)
chunk_size = chunk_height * w * 2
chunk_y = y
if chunk_count:
for c in range(0, chunk_count):
buf = f.read(chunk_size)
self.block(x, chunk_y,
x2, chunk_y + chunk_height - 1,
buf)
chunk_y += chunk_height
if remainder:
buf = f.read(remainder * w * 2)
self.block(x, chunk_y,
x2, chunk_y + remainder - 1,
buf)
def draw_letter(self, x, y, letter, font, color, background=0,
landscape=False, rotate_180=False):
"""Draw a letter.
Args:
x (int): Starting X position.
y (int): Starting Y position.
letter (string): Letter to draw.
font (XglcdFont object): Font.
color (int): RGB565 color value.
background (int): RGB565 background color (default: black)
landscape (bool): Orientation (default: False = portrait)
rotate_180 (bool): Rotate text by 180 degrees
"""
buf, w, h = font.get_letter(letter, color, background, landscape)
if rotate_180:
# Manually rotate the buffer by 180 degrees
# ensure bytes pairs for each pixel retain color565
new_buf = bytearray(len(buf))
num_pixels = len(buf) // 2
for i in range(num_pixels):
# The index for the new buffer's byte pair
new_idx = (num_pixels - 1 - i) * 2
# The index for the original buffer's byte pair
old_idx = i * 2
# Swap the pixels
new_buf[new_idx], new_buf[new_idx + 1] = buf[old_idx], buf[old_idx + 1]
buf = new_buf
# Check for errors (Font could be missing specified letter)
if w == 0:
return w, h
if landscape:
y -= w
if self.is_off_grid(x, y, x + h - 1, y + w - 1):
return 0, 0
self.block(x, y,
x + h - 1, y + w - 1,
buf)
else:
if self.is_off_grid(x, y, x + w - 1, y + h - 1):
return 0, 0
self.block(x, y,
x + w - 1, y + h - 1,
buf)
return w, h
def draw_line(self, x1, y1, x2, y2, color):
"""Draw a line using Bresenham's algorithm.
Args:
x1, y1 (int): Starting coordinates of the line
x2, y2 (int): Ending coordinates of the line
color (int): RGB565 color value.
"""
# Check for horizontal line
if y1 == y2:
if x1 > x2:
x1, x2 = x2, x1
self.draw_hline(x1, y1, x2 - x1 + 1, color)
return
# Check for vertical line
if x1 == x2:
if y1 > y2:
y1, y2 = y2, y1
self.draw_vline(x1, y1, y2 - y1 + 1, color)
return
# Confirm coordinates in boundary
if self.is_off_grid(min(x1, x2), min(y1, y2),
max(x1, x2), max(y1, y2)):
return
# Changes in x, y
dx = x2 - x1
dy = y2 - y1
# Determine how steep the line is
is_steep = abs(dy) > abs(dx)
# Rotate line
if is_steep:
x1, y1 = y1, x1
x2, y2 = y2, x2
# Swap start and end points if necessary
if x1 > x2:
x1, x2 = x2, x1
y1, y2 = y2, y1
# Recalculate differentials
dx = x2 - x1
dy = y2 - y1
# Calculate error
error = dx >> 1
ystep = 1 if y1 < y2 else -1
y = y1
for x in range(x1, x2 + 1):
# Had to reverse HW ????
if not is_steep:
self.draw_pixel(x, y, color)
else:
self.draw_pixel(y, x, color)
error -= abs(dy)
if error < 0:
y += ystep
error += dx
def draw_lines(self, coords, color):
"""Draw multiple lines.
Args:
coords ([[int, int],...]): Line coordinate X, Y pairs
color (int): RGB565 color value.
"""
# Starting point
x1, y1 = coords[0]
# Iterate through coordinates
for i in range(1, len(coords)):
x2, y2 = coords[i]
self.draw_line(x1, y1, x2, y2, color)
x1, y1 = x2, y2
def draw_pixel(self, x, y, color):
"""Draw a single pixel.
Args:
x (int): X position.
y (int): Y position.
color (int): RGB565 color value.
"""
if self.is_off_grid(x, y, x, y):
return
self.block(x, y, x, y, color.to_bytes(2, 'big'))
def draw_polygon(self, sides, x0, y0, r, color, rotate=0):
"""Draw an n-sided regular polygon.
Args:
sides (int): Number of polygon sides.
x0, y0 (int): Coordinates of center point.
r (int): Radius.
color (int): RGB565 color value.
rotate (Optional float): Rotation in degrees relative to origin.
Note:
The center point is the center of the x0,y0 pixel.
Since pixels are not divisible, the radius is integer rounded
up to complete on a full pixel. Therefore diameter = 2 x r + 1.
"""
coords = []
theta = radians(rotate)
n = sides + 1
for s in range(n):
t = 2.0 * pi * s / sides + theta
coords.append([int(r * cos
# Cast to python float first to fix rounding errors
self.draw_lines(coords, color=color)
def draw_rectangle(self, x, y, w, h, color):
"""Draw a rectangle.
Args:
x (int): Starting X position.
y (int): Starting Y position.
w (int): Width of rectangle.
h (int): Height of rectangle.
color (int): RGB565 color value.
"""
x2 = x + w - 1
y2 = y + h - 1
self.draw_hline(x, y, w, color)
self.draw_hline(x, y2, w, color)
self.draw_vline(x, y, h, color)
self.draw_vline(x2, y, h, color)
def draw_sprite(self, buf, x, y, w, h):
"""Draw a sprite (optimized for horizontal drawing).
Args:
buf (bytearray): Buffer to draw.
x (int): Starting X position.
y (int): Starting Y position.
w (int): Width of drawing.
h (int): Height of drawing.
"""
x2 = x + w - 1
y2 = y + h - 1
if self.is_off_grid(x, y, x2, y2):
return
self.block(x, y, x2, y2, buf)
def draw_text(self, x, y, text, font, color, background=0,
landscape=False, rotate_180=False, spacing=1):
"""Draw text.
Args:
x (int): Starting X position
y (int): Starting Y position
text (string): Text to draw
font (XglcdFont object): Font
color (int): RGB565 color value
background (int): RGB565 background color (default: black)
landscape (bool): Orientation (default: False = portrait)
rotate_180 (bool): Rotate text by 180 degrees
spacing (int): Pixels between letters (default: 1)
"""
iterable_text = reversed(text) if rotate_180 else text
for letter in iterable_text:
# Get letter array and letter dimensions
w, h = self.draw_letter(x, y, letter, font, color, background,
landscape, rotate_180)
# Stop on error
if w == 0 or h == 0:
print('Invalid width {0} or height {1}'.format(w, h))
return
if landscape:
# Fill in spacing
if spacing:
self.fill_hrect(x, y - w - spacing, h, spacing, background)
# Position y for next letter
y -= (w + spacing)
else:
# Fill in spacing
if spacing:
self.fill_hrect(x + w, y, spacing, h, background)
# Position x for next letter
x += (w + spacing)
# # Fill in spacing
# if spacing:
# self.fill_vrect(x + w, y, spacing, h, background)
# # Position x for next letter
# x += w + spacing
def draw_text8x8(self, x, y, text, color, background=0,
rotate=0):
"""Draw text using built-in MicroPython 8x8 bit font.
Args:
x (int): Starting X position.
y (int): Starting Y position.
text (string): Text to draw.
color (int): RGB565 color value.
background (int): RGB565 background color (default: black).
rotate(int): 0, 90, 180, 270
"""
w = len(text) * 8
h = 8
# Confirm coordinates in boundary
if self.is_off_grid(x, y, x + 7, y + 7):
return
buf = bytearray(w * 16)
fbuf = FrameBuffer(buf, w, h, RGB565)
if background != 0:
# Swap background color bytes to correct for framebuf endianness
b_color = ((background & 0xFF) << 8) | ((background & 0xFF00) >> 8)
fbuf.fill(b_color)
# Swap text color bytes to correct for framebuf endianness
t_color = ((color & 0xFF) << 8) | ((color & 0xFF00) >> 8)
fbuf.text(text, 0, 0, t_color)
if rotate == 0:
self.block(x, y, x + w - 1, y + (h - 1), buf)
elif rotate == 90:
buf2 = bytearray(w * 16)
fbuf2 = FrameBuffer(buf2, h, w, RGB565)
for y1 in range(h):
for x1 in range(w):
fbuf2.pixel(y1, x1,
fbuf.pixel(x1, (h - 1) - y1))
self.block(x, y, x + (h - 1), y + w - 1, buf2)
elif rotate == 180:
buf2 = bytearray(w * 16)
fbuf2 = FrameBuffer(buf2, w, h, RGB565)
for y1 in range(h):
for x1 in range(w):
fbuf2.pixel(x1, y1,
fbuf.pixel((w - 1) - x1, (h - 1) - y1))
self.block(x, y, x + w - 1, y + (h - 1), buf2)
elif rotate == 270:
buf2 = bytearray(w * 16)
fbuf2 = FrameBuffer(buf2, h, w, RGB565)
for y1 in range(h):
for x1 in range(w):
fbuf2.pixel(y1, x1,
fbuf.pixel((w - 1) - x1, y1))
self.block(x, y, x + (h - 1), y + w - 1, buf2)
def draw_vline(self, x, y, h, color):
"""Draw a vertical line.
Args:
x (int): Starting X position.
y (int): Starting Y position.
h (int): Height of line.
color (int): RGB565 color value.
"""
# Confirm coordinates in boundary
if self.is_off_grid(x, y, x, y + h - 1):
return
line = color.to_bytes(2, 'big') * h
self.block(x, y, x, y + h - 1, line)
def fill_circle(self, x0, y0, r, color):
"""Draw a filled circle.
Args:
x0 (int): X coordinate of center point.
y0 (int): Y coordinate of center point.
r (int): Radius.
color (int): RGB565 color value.
"""
f = 1 - r
dx = 1
dy = -r - r
x = 0
y = r
self.draw_vline(x0, y0 - r, 2 * r + 1, color)
while x < y:
if f >= 0:
y -= 1
dy += 2
f += dy
x += 1
dx += 2
f += dx
self.draw_vline(x0 + x, y0 - y, 2 * y + 1, color)
self.draw_vline(x0 - x, y0 - y, 2 * y + 1, color)
self.draw_vline(x0 - y, y0 - x, 2 * x + 1, color)
self.draw_vline(x0 + y, y0 - x, 2 * x + 1, color)
def fill_ellipse(self, x0, y0, a, b, color):
"""Draw a filled ellipse.
Args:
x0, y0 (int): Coordinates of center point.
a (int): Semi axis horizontal.
b (int): Semi axis vertical.
color (int): RGB565 color value.
Note:
The center point is the center of the x0,y0 pixel.
Since pixels are not divisible, the axes are integer rounded
up to complete on a full pixel. Therefore the major and
minor axes are increased by 1.
"""
a2 = a * a
b2 = b * b
twoa2 = a2 + a2
twob2 = b2 + b2
x = 0
y = b
px = 0
py = twoa2 * y
# Plot initial points
self.draw_line(x0, y0 - y, x0, y0 + y, color)
# Region 1
p = round(b2 - (a2 * b) + (0.25 * a2))
while px < py:
x += 1
px += twob2
if p < 0:
p += b2 + px
else:
y -= 1
py -= twoa2
p += b2 + px - py
self.draw_line(x0 + x, y0 - y, x0 + x, y0 + y, color)
self.draw_line(x0 - x, y0 - y, x0 - x, y0 + y, color)
# Region 2
p = round(b2 * (x + 0.5) * (x + 0.5) +
a2 * (y - 1) * (y - 1) - a2 * b2)
while y > 0:
y -= 1
py -= twoa2
if p > 0:
p += a2 - py
else:
x += 1
px += twob2
p += a2 - py + px
self.draw_line(x0 + x, y0 - y, x0 + x, y0 + y, color)
self.draw_line(x0 - x, y0 - y, x0 - x, y0 + y, color)
def fill_hrect(self, x, y, w, h, color):
"""Draw a filled rectangle (optimized for horizontal drawing).
Args:
x (int): Starting X position.
y (int): Starting Y position.
w (int): Width of rectangle.
h (int): Height of rectangle.
color (int): RGB565 color value.
"""
if self.is_off_grid(x, y, x + w - 1, y + h - 1):
return
chunk_height = 1024 // w
chunk_count, remainder = divmod(h, chunk_height)
chunk_size = chunk_height * w
chunk_y = y
if chunk_count:
buf = color.to_bytes(2, 'big') * chunk_size
for c in range(0, chunk_count):
self.block(x, chunk_y,
x + w - 1, chunk_y + chunk_height - 1,
buf)
chunk_y += chunk_height
if remainder:
buf = color.to_bytes(2, 'big') * remainder * w
self.block(x, chunk_y,
x + w - 1, chunk_y + remainder - 1,
buf)
def fill_rectangle(self, x, y, w, h, color):
"""Draw a filled rectangle.
Args:
x (int): Starting X position.
y (int): Starting Y position.
w (int): Width of rectangle.
h (int): Height of rectangle.
color (int): RGB565 color value.
"""
if self.is_off_grid(x, y, x + w - 1, y + h - 1):
return
if w > h:
self.fill_hrect(x, y, w, h, color)
else:
self.fill_vrect(x, y, w, h, color)
def fill_polygon(self, sides, x0, y0, r, color, rotate=0):
"""Draw a filled n-sided regular polygon.
Args:
sides (int): Number of polygon sides.
x0, y0 (int): Coordinates of center point.
r (int): Radius.
color (int): RGB565 color value.
rotate (Optional float): Rotation in degrees relative to origin.
Note:
The center point is the center of the x0,y0 pixel.
Since pixels are not divisible, the radius is integer rounded
up to complete on a full pixel. Therefore diameter = 2 x r + 1.
"""
# Determine side coordinates
coords = []
theta = radians(rotate)
n = sides + 1
for s in range(n):
t = 2.0 * pi * s / sides + theta
coords.append([int(r * cos
# Starting point
x1, y1 = coords[0]
# Minimum Maximum X dict
xdict = {y1: [x1, x1]}
# Iterate through coordinates
for row in coords[1:]:
x2, y2 = row
xprev, yprev = x2, y2
# Calculate perimeter
# Check for horizontal side
if y1 == y2:
if x1 > x2:
x1, x2 = x2, x1
if y1 in xdict:
xdict[y1] = [min(x1, xdict[y1][0]), max(x2, xdict[y1][1])]
else:
xdict[y1] = [x1, x2]
x1, y1 = xprev, yprev
continue
# Non horizontal side
# Changes in x, y
dx = x2 - x1
dy = y2 - y1
# Determine how steep the line is
is_steep = abs(dy) > abs(dx)
# Rotate line
if is_steep:
x1, y1 = y1, x1
x2, y2 = y2, x2
# Swap start and end points if necessary
if x1 > x2:
x1, x2 = x2, x1
y1, y2 = y2, y1
# Recalculate differentials
dx = x2 - x1
dy = y2 - y1
# Calculate error
error = dx >> 1
ystep = 1 if y1 < y2 else -1
y = y1
# Calcualte minimum and maximum x values
for x in range(x1, x2 + 1):
if is_steep:
if x in xdict:
xdict[x] = [min(y, xdict[x][0]), max(y, xdict[x][1])]
else:
xdict[x] = [y, y]
else:
if y in xdict:
xdict[y] = [min(x, xdict[y][0]), max(x, xdict[y][1])]
else:
xdict[y] = [x, x]
error -= abs(dy)
if error < 0:
y += ystep
error += dx
x1, y1 = xprev, yprev
# Fill polygon
for y, x in xdict.items():
self.draw_hline(x[0], y, x[1] - x[0] + 2, color)
def fill_vrect(self, x, y, w, h, color):
"""Draw a filled rectangle (optimized for vertical drawing).
Args:
x (int): Starting X position.
y (int): Starting Y position.
w (int): Width of rectangle.
h (int): Height of rectangle.
color (int): RGB565 color value.
"""
if self.is_off_grid(x, y, x + w - 1, y + h - 1):
return
chunk_width = 1024 // h
chunk_count, remainder = divmod(w, chunk_width)
chunk_size = chunk_width * h
chunk_x = x
if chunk_count:
buf = color.to_bytes(2, 'big') * chunk_size
for c in range(0, chunk_count):
self.block(chunk_x, y,
chunk_x + chunk_width - 1, y + h - 1,
buf)
chunk_x += chunk_width
if remainder:
buf = color.to_bytes(2, 'big') * remainder * h
self.block(chunk_x, y,
chunk_x + remainder - 1, y + h - 1,
buf)
def invert(self, enable=True):
"""Enables or disables inversion of display colors.
Args:
enable (Optional bool): True=enable, False=disable
"""
if enable:
self.write_cmd(self.INVON)
else:
self.write_cmd(self.INVOFF)
def is_off_grid(self, xmin, ymin, xmax, ymax):
"""Check if coordinates extend past display boundaries.
Args:
xmin (int): Minimum horizontal pixel.
ymin (int): Minimum vertical pixel.
xmax (int): Maximum horizontal pixel.
ymax (int): Maximum vertical pixel.
Returns:
boolean: False = Coordinates OK, True = Error.
"""
if xmin < 0:
print('x-coordinate: {0} below minimum of 0.'.format(xmin))
return True
if ymin < 0:
print('y-coordinate: {0} below minimum of 0.'.format(ymin))
return True
if xmax >= self.width:
print('x-coordinate: {0} above maximum of {1}.'.format(
xmax, self.width - 1))
return True
if ymax >= self.height:
print('y-coordinate: {0} above maximum of {1}.'.format(
ymax, self.height - 1))
return True
return False
def load_sprite(self, path, w, h):
"""Load sprite image.
Args:
path (string): Image file path.
w (int): Width of image.
h (int): Height of image.
Notes:
w x h cannot exceed 2048 on boards w/o PSRAM
"""
buf_size = w * h * 2
with open(path, "rb") as f:
return f.read(buf_size)
def reset_cpy(self):
"""Perform reset: Low=initialization, High=normal operation.
Notes: CircuitPython implemntation
"""
self.rst.value = False
sleep(.05)
self.rst.value = True
sleep(.05)
def reset_mpy(self):
"""Perform reset: Low=initialization, High=normal operation.
Notes: MicroPython implemntation
"""
self.rst(0)
sleep(.05)
self.rst(1)
sleep(.05)
def scroll(self, y):
"""Scroll display vertically.
Args:
y (int): Number of pixels to scroll display.
"""
self.write_cmd(self.VSCRSADD, y >> 8, y & 0xFF)
def set_scroll(self, top, bottom):
"""Set the height of the top and bottom scroll margins.
Args:
top (int): Height of top scroll margin
bottom (int): Height of bottom scroll margin
"""
if top + bottom <= self.height:
middle = self.height - (top + bottom)
self.write_cmd(self.VSCRDEF,
top >> 8,
top & 0xFF,
middle >> 8,
middle & 0xFF,
bottom >> 8,
bottom & 0xFF)
def sleep(self, enable=True):
"""Enters or exits sleep mode.
Args:
enable (bool): True (default)=Enter sleep mode, False=Exit sleep
"""
if enable:
self.write_cmd(self.SLPIN)
else:
self.write_cmd(self.SLPOUT)
def write_cmd_mpy(self, command, *args):
"""Write command to OLED (MicroPython).
Args:
command (byte): ILI9341 command code.
*args (optional bytes): Data to transmit.
"""
self.dc(0)
self.cs(0)
self.spi.write(bytearray([command]))
self.cs(1)
# Handle any passed data
if len(args) > 0:
self.write_data(bytearray(args))
def write_cmd_cpy(self, command, *args):
"""Write command to OLED (CircuitPython).
Args:
command (byte): ILI9341 command code.
*args (optional bytes): Data to transmit.
"""
self.dc.value = False
self.cs.value = False
# Confirm SPI locked before writing
while not self.spi.try_lock():
pass
self.spi.write(bytearray([command]))
self.spi.unlock()
self.cs.value = True
# Handle any passed data
if len(args) > 0:
self.write_data(bytearray(args))
def write_data_mpy(self, data):
"""Write data to OLED (MicroPython).
Args:
data (bytes): Data to transmit.
"""
self.dc(1)
self.cs(0)
self.spi.write(data)
self.cs(1)
def write_data_cpy(self, data):
"""Write data to OLED (CircuitPython).
Args:
data (bytes): Data to transmit.
"""
self.dc.value = True
self.cs.value = False
# Confirm SPI locked before writing
while not self.spi.try_lock():
pass
self.spi.write(data)
self.spi.unlock()
self.cs.value = True
Afficher le code brut
Téléchargez et téléchargez le xpt2046.py
- Cliquez ici pour télécharger le code xpt2046.py ;
- Copiez le code dans un fichier sur Thonny IDE ;
- Allez dans Fichier > Enregistrer sous… et sélectionnez Périphérique MicroPython ;
- Enregistrez le fichier sous le nom xpt2046.py (ne changez pas le nom).
"""XPT2046 Touch module."""
from time import sleep


class Touch(object):
    """Serial interface for XPT2046 Touch Screen Controller."""

    # Command constants from ILI9341 datasheet
    GET_X = const(0b11010000)  # X position
    GET_Y = const(0b10010000)  # Y position
    GET_Z1 = const(0b10110000)  # Z1 position
    GET_Z2 = const(0b11000000)  # Z2 position
    GET_TEMP0 = const(0b10000000)  # Temperature 0
    GET_TEMP1 = const(0b11110000)  # Temperature 1
    GET_BATTERY = const(0b10100000)  # Battery monitor
    GET_AUX = const(0b11100000)  # Auxiliary input to ADC

    def __init__(self, spi, cs, int_pin=None, int_handler=None,
                 width=240, height=320,
                 x_min=100, x_max=1962, y_min=100, y_max=1900):
        """Initialize touch screen controller.

        Args:
            spi (Class Spi):  SPI interface for OLED
            cs (Class Pin):  Chip select pin
            int_pin (Class Pin):  Touch controller interrupt pin
            int_handler (function): Handler for screen interrupt
            width (int): Width of LCD screen
            height (int): Height of LCD screen
            x_min (int): Minimum x coordinate
            x_max (int): Maximum x coordinate
            y_min (int): Minimum Y coordinate
            y_max (int): Maximum Y coordinate
        """
        self.spi = spi
        self.cs = cs
        self.cs.init(self.cs.OUT, value=1)
        self.rx_buf = bytearray(3)  # Receive buffer
        self.tx_buf = bytearray(3)  # Transmit buffer
        self.width = width
        self.height = height
        # Set calibration
        self.x_min = x_min
        self.x_max = x_max
        self.y_min = y_min
        self.y_max = y_max
        self.x_multiplier = width / (x_max - x_min)
        self.x_add = x_min * -self.x_multiplier
        self.y_multiplier = height / (y_max - y_min)
        self.y_add = y_min * -self.y_multiplier

        if int_pin is not None:
            self.int_pin = int_pin
            self.int_pin.init(int_pin.IN)
            self.int_handler = int_handler
            self.int_locked = False
            int_pin.irq(trigger=int_pin.IRQ_FALLING | int_pin.IRQ_RISING,
                        handler=self.int_press)

    def get_touch(self):
        """Take multiple samples to get accurate touch reading."""
        timeout = 2  # set timeout to 2 seconds
        confidence = 5
        buff = [[0, 0] for x in range(confidence)]
        buf_length = confidence  # Require a confidence of 5 good samples
        buffptr = 0  # Track current buffer position
        nsamples = 0  # Count samples
        while timeout > 0:
            if nsamples == buf_length:
                meanx = sum([c[0] for c in buff]) // buf_length
                meany = sum([c[1] for c in buff]) // buf_length
                dev = sum([(c[0] - meanx)**2 +
                          (c[1] - meany)**2 for c in buff]) / buf_length
                if dev <= 50:  # Deviation should be under margin of 50
                    return self.normalize(meanx, meany)
            # get a new value
            sample = self.raw_touch()  # get a touch
            if sample is None:
                nsamples = 0    # Invalidate buff
            else:
                buff[buffptr] = sample  # put in buff
                buffptr = (buffptr + 1) % buf_length  # Incr, until rollover
                nsamples = min(nsamples + 1, buf_length)  # Incr. until max

            sleep(.05)
            timeout -= .05
        return None

    def int_press(self, pin):
        """Send X,Y values to passed interrupt handler."""
        if not pin.value() and not self.int_locked:
            self.int_locked = True  # Lock Interrupt
            buff = self.raw_touch()

            if buff is not None:
                x, y = self.normalize(*buff)
                self.int_handler(x, y)
            sleep(.1)  # Debounce falling edge
        elif pin.value() and self.int_locked:
            sleep(.1)  # Debounce rising edge
            self.int_locked = False  # Unlock interrupt

    def normalize(self, x, y):
        """Normalize mean X,Y values to match LCD screen."""
        x = int(self.x_multiplier * x + self.x_add)
        y = int(self.y_multiplier * y + self.y_add)
        return x, y

    def raw_touch(self):
        """Read raw X,Y touch values.

        Returns:
            tuple(int, int): X, Y
        """
        x = self.send_command(self.GET_X)
        y = self.send_command(self.GET_Y)
        if self.x_min <= x <= self.x_max and self.y_min <= y <= self.y_max:
            return (x, y)
        else:
            return None

    def send_command(self, command):
        """Write command to XT2046 (MicroPython).

        Args:
            command (byte): XT2046 command code.
        Returns:
            int: 12 bit response
        """
        self.tx_buf[0] = command
        self.cs(0)
        self.spi.write_readinto(self.tx_buf, self.rx_buf)
        self.cs(1)

        return (self.rx_buf[1] << 4) | (self.rx_buf[2] >> 4)
Afficher le code brut
Téléchargez et téléchargez le xglcd_font.py
- Cliquez ici pour télécharger le code xglcd_font.py ;
- Copiez le code dans un fichier sur Thonny IDE ;
- Allez dans Fichier > Enregistrer sous… et sélectionnez Périphérique MicroPython ;
- Enregistrez le fichier sous le nom xglcd_font.py (ne changez pas le nom).
"""XGLCD Font Utility."""
from math import ceil, floor


class XglcdFont(object):
    """Font data in X-GLCD format.

    Attributes:
        letters: A bytearray of letters (columns consist of bytes)
        width: Maximum pixel width of font
        height: Pixel height of font
        start_letter: ASCII number of first letter
        height_bytes: How many bytes comprises letter height

    Note:
        Font files can be generated with the free version of MikroElektronika
        GLCD Font Creator:  www.mikroe.com/glcd-font-creator
        The font file must be in X-GLCD 'C' format.
        To save text files from this font creator program in Win7 or higher
        you must use XP compatibility mode or you can just use the clipboard.
    """

    # Dict to tranlate bitwise values to byte position
    BIT_POS = {1: 0, 2: 2, 4: 4, 8: 6, 16: 8, 32: 10, 64: 12, 128: 14, 256: 16}

    def __init__(self, path, width, height, start_letter=32, letter_count=96):
        """Constructor for X-GLCD Font object.

        Args:
            path (string): Full path of font file
            width (int): Maximum width in pixels of each letter
            height (int): Height in pixels of each letter
            start_letter (int): First ACII letter.  Default is 32.
            letter_count (int): Total number of letters.  Default is 96.
        """
        self.width = width
        self.height = max(height, 8)
        self.start_letter = start_letter
        self.letter_count = letter_count
        self.bytes_per_letter = (floor(
            (self.height - 1) / 8) + 1) * self.width + 1
        self.__load_xglcd_font(path)

    def __load_xglcd_font(self, path):
        """Load X-GLCD font data from text file.

        Args:
            path (string): Full path of font file.
        """
        bytes_per_letter = self.bytes_per_letter
        # Buffer to hold letter byte values
        self.letters = bytearray(bytes_per_letter * self.letter_count)
        mv = memoryview(self.letters)
        offset = 0
        with open(path, 'r') as f:
            for line in f:
                # Skip lines that do not start with hex values
                line = line.strip()
                if len(line) == 0 or line[0:2] != '0x':
                    continue
                # Remove comments
                comment = line.find('//')
                if comment != -1:
                    line = line[0:comment].strip()
                # Remove trailing commas
                if line.endswith(','):
                    line = line[0:len(line) - 1]
                # Convert hex strings to bytearray and insert in to letters
                mv[offset: offset + bytes_per_letter] = bytearray(
                    int(b, 16) for b in line.split(','))
                offset += bytes_per_letter

    def lit_bits(self, n):
        """Return positions of 1 bits only."""
        while n:
            b = n & (~n+1)
            yield self.BIT_POS[b]
            n ^= b

    def get_letter(self, letter, color, background=0, landscape=False):
        """Convert letter byte data to pixels.

        Args:
            letter (string): Letter to return (must exist within font).
            color (int): RGB565 color value.
            background (int): RGB565 background color (default: black).
            landscape (bool): Orientation (default: False = portrait)
        Returns:
            (bytearray): Pixel data.
            (int, int): Letter width and height.
        """
        # Get index of letter
        letter_ord = ord(letter) - self.start_letter
        # Confirm font contains letter
        if letter_ord >= self.letter_count:
            print('Font does not contain character: ' + letter)
            return b'', 0, 0
        bytes_per_letter = self.bytes_per_letter
        offset = letter_ord * bytes_per_letter
        mv = memoryview(self.letters[offset:offset + bytes_per_letter])

        # Get width of letter (specified by first byte)
        letter_width = mv[0]
        letter_height = self.height
        # Get size in bytes of specified letter
        letter_size = letter_height * letter_width
        # Create buffer (double size to accommodate 16 bit colors)
        if background:
            buf = bytearray(background.to_bytes(2, 'big') * letter_size)
        else:
            buf = bytearray(letter_size * 2)

        msb, lsb = color.to_bytes(2, 'big')

        if landscape:
            # Populate buffer in order for landscape
            pos = (letter_size * 2) - (letter_height * 2)
            lh = letter_height
            # Loop through letter byte data and convert to pixel data
            for b in mv[1:]:
                # Process only colored bits
                for bit in self.lit_bits(b):
                    buf[bit + pos] = msb
                    buf[bit + pos + 1] = lsb
                if lh > 8:
                    # Increment position by double byte
                    pos += 16
                    lh -= 8
                else:
                    # Descrease position to start of previous column
                    pos -= (letter_height * 4) - (lh * 2)
                    lh = letter_height
        else:
            # Populate buffer in order for portrait
            col = 0  # Set column to first column
            bytes_per_letter = ceil(letter_height / 8)
            letter_byte = 0
            # Loop through letter byte data and convert to pixel data
            for b in mv[1:]:
                # Process only colored bits
                segment_size = letter_byte * letter_width * 16
                for bit in self.lit_bits(b):
                    pos = (bit * letter_width) + (col * 2) + segment_size
                    buf[pos] = msb
                    pos = (bit * letter_width) + (col * 2) + 1 + segment_size
                    buf[pos] = lsb
                letter_byte += 1
                if letter_byte + 1 > bytes_per_letter:
                    col += 1
                    letter_byte = 0

        return buf, letter_width, letter_height

    def measure_text(self, text, spacing=1):
        """Measure length of text string in pixels.

        Args:
            text (string): Text string to measure
            spacing (optional int): Pixel spacing between letters.  Default: 1.
        Returns:
            int: length of text
        """
        length = 0
        for letter in text:
            # Get index of letter
            letter_ord = ord(letter) - self.start_letter
            offset = letter_ord * self.bytes_per_letter
            # Add length of letter and spacing
            length += self.letters[offset] + spacing
        return length
Afficher le code brut
Avec les modules chargés sur la carte CYD, vous pouvez désormais utiliser les fonctionnalités de la bibliothèque dans votre code pour contrôler l’affichage.
Avant de continuer, vous devez avoir les fichiers suivants chargés sur votre carte. Vous pouvez vérifier cela dans la barre latérale gauche de Thonny IDE, en allant dans Affichage > Fichiers.
 5")
Dessiner du texte statique – Code
L’affichage de texte statique sur l’écran LCD est très simple. Tout ce que vous avez à faire est de charger tous les modules requis, d’initialiser l’affichage, de sélectionner l’endroit où vous souhaitez que les caractères soient affichés à l’écran et le contenu du message qui sera affiché.
Cet exemple affiche le message « ESP32 dit bonjour ! message aux coordonnées (0, 0), au centre de l’écran et texte avec rotation.
# Rui Santos & Sara Santos - Raspberryme.com
# Complete project details at https://Raspberryme.com/micropython-cheap-yellow-display-board-cyd-esp32-2432s028r/

from machine import Pin, SPI, ADC, idle
import os
from time import sleep

# Save this file as ili9341.py https://github.com/rdagger/micropython-ili9341/blob/master/ili9341.py
from ili9341 import Display, color565
# Save this file as xglcd_font.py https://github.com/rdagger/micropython-ili9341/blob/master/xglcd_font.py
from xglcd_font import XglcdFont

# Function to set up SPI for TFT display
display_spi = SPI(1, baudrate=60000000, sck=Pin(14), mosi=Pin(13))
# Set up display
display = Display(display_spi, dc=Pin(2), cs=Pin(15), rst=Pin(15),
                  width=320, height=240, rotation=90)

def draw_text():
    # Set colors
    white_color = color565(255, 255, 255)  # white color
    black_color = color565(0, 0, 0)        # black color

    # Turn on display backlight
    backlight = Pin(21, Pin.OUT)
    backlight.on()

    # Clear display
    display.clear(black_color)

    # Draw the text on (0, 0) coordinates (x, y, text, font color, font background color, rotation)
    display.draw_text8x8(0, 0, 'ESP32 says hello!', white_color, black_color, 0)

    # Draw the text on the center of the display
    font_size = 8
    text_msg = 'Centered text'
    x_center = int((display.width-len(text_msg)*font_size)/2)
    y_center = int(((display.height)/2)-(font_size/2))
    display.draw_text8x8(x_center, y_center, text_msg, white_color, black_color, 0)

    # Draw the text on the right with rotation
    display.draw_text8x8(display.width-font_size, 0, 'Text with rotation', white_color, black_color, 90)

try:
    draw_text()
except Exception as e:
    print('Error occured: ', e)
except KeyboardInterrupt:
    print('Program Interrupted by the user')
    display.cleanup()
Afficher le code brut
Comment fonctionne le code
Jetons un coup d’œil rapide au fonctionnement du code pour voir comment afficher le texte à l’écran.
Importation de bibliothèques
Tout d’abord, vous devez importer les bibliothèques requises
from machine import Pin, SPI, ADC, idle
import os
from time import sleep

# Save this file as ili9341.py https://github.com/rdagger/micropython-ili9341/blob/master/ili9341.py
from ili9341 import Display, color565
# Save this file as xglcd_font.py https://github.com/rdagger/micropython-ili9341/blob/master/xglcd_font.py
from xglcd_font import XglcdFont
Initialiser le bus SPI et l’affichage
Ensuite, vous initialisez un bus SPI pour communiquer avec l’écran : vérifiez que votre écran utilise également GPIO 14 comme SCK et GPIO 13 comme MOSI.
# Function to set up SPI for TFT display
display_spi = SPI(1, baudrate=60000000, sck=Pin(14), mosi=Pin(13))
Créez un objet Display appelé display et passons comme arguments le bus SPI que nous venons de créer, les broches DC, CS et RST, ainsi que la taille et la rotation de l’affichage. Modifiez les paramètres suivants si votre écran a un brochage différent ou des dimensions différentes.
# Set up display
display = Display(display_spi, dc=Pin(2), cs=Pin(15), rst=Pin(15),
                  width=320, height=240, rotation=90)
Si votre carte est similaire à celle utilisée dans ce didacticiel, vous pouvez vérifier le brochage ici : Brochage de l’écran jaune bon marché ESP32 (CYD) (ESP32-2432S028R).
Après avoir initialisé et configuré l’affichage, nous créons une fonction pour dessiner un exemple de texte.
def draw_text():Créer des couleurs
Nous commençons par créer des variables pour faire référence aux couleurs blanches et noires :
white_color = color565(255, 255, 255)  # white color
black_color = color565(0, 0, 0)        # black color
Allumez le rétroéclairage et définissez la couleur d’arrière-plan
Ensuite, nous initialisons la broche qui contrôle le rétroéclairage et la réglons sur ON pour allumer le rétroéclairage.
# Turn on display backlight
backlight = Pin(21, Pin.OUT)
backlight.on()
Effacez l’affichage en définissant la couleur d’arrière-plan sur noir.
# Clear display
display.clear(black_color)
Affichage du texte
Enfin, pour dessiner du texte, il vous suffit d’appeler la fonction draw_8x8(). Cette fonction accepte comme arguments : les coordonnées x et y, le message que vous souhaitez afficher, la couleur de la police, la couleur du fond et la rotation.
# Draw the text on (0, 0) coordinates (x, y, text, font color, font background color, rotation)
display.draw_text8x8(0, 0, 'ESP32 says hello!', white_color, black_color, 0)
Afficher le texte centré
Les lignes suivantes calculent le centre de l’affichage pour imprimer le texte centré.
# Draw the text on the center of the display
font_size = 8
text_msg = 'Centered text'
x_center = int((display.width-len(text_msg)*font_size)/2)
y_center = int(((display.height)/2)-(font_size/2))
display.draw_text8x8(x_center, y_center, text_msg, white_color, black_color, 0)
Afficher le texte avec rotation
Cela affiche le texte avec rotation. La rotation est le dernier argument de la fonction draw_text8x8().
# Draw the text on the right with rotation
display.draw_text8x8(display.width-font_size, 0, 'Text with rotation', white_color, black_color, 90)
Enfin, nous appelons la fonction draw_text() que nous avons créée précédemment pour afficher les trois messages texte à différents endroits de l’écran.
try:
    draw_text()
Tester l’exemple
Exécutez le code suivant sur votre écran. Vous devriez obtenir quelque chose de similaire à celui indiqué dans l’image suivante.
 6")
Remarque : si vous souhaitez que le code s’exécute automatiquement au démarrage de l’ESP32 (par exemple, sans être connecté à votre ordinateur), vous devez enregistrer le fichier sur la carte sous le nom main.py.
Lorsque vous nommez un fichier main.py, l’ESP32 exécutera automatiquement ce fichier au démarrage. Si vous lui donnez un nom différent, il sera toujours enregistré sur le système de fichiers de la carte, mais il ne s’exécutera pas automatiquement au démarrage.
Charger une police personnalisée et un texte d’affichage – Code
La bibliothèque vous permet de choisir différentes polices pour afficher votre texte (même si les options sont limitées). Vous pouvez voir toutes les options de police disponibles ici : Dossier des polices de la bibliothèque.
Avec une connexion ouverte avec votre carte sur Thonny IDE, allez dans Affichage > Fichiers. Un nouvel onglet sur le côté gauche s’ouvrira avec les fichiers enregistrés sur l’ESP32. Cliquez sur l’icône à côté du périphérique MicroPython et cliquez sur Nouveau répertoire…
 7")
Le nouveau répertoire doit s’appeler fonts.
 8")
A titre d’exemple, nous allons charger la police Unispace12x24. Vous pouvez charger n’importe quelle police disponible sur le référentiel de la bibliothèque. Suivez les étapes suivantes :
- Cliquez ici pour télécharger le code Unispace12x24.c ;
- Copiez le contenu dans un fichier sur Thonny IDE ;
- Allez dans Fichier > Enregistrer sous… et sélectionnez Périphérique MicroPython ;
- Enregistrez le fichier sous le nom Unispace12x24.c (ne changez pas le nom) dans le dossier des polices.
 9")
Voici le code qui dessine le texte à l’aide d’une police personnalisée. Ceci est dans l’ensemble similaire aux exemples précédents, mais utilise une police personnalisée.
# Rui Santos & Sara Santos - Raspberryme.com
# Complete project details at https://Raspberryme.com/micropython-cheap-yellow-display-board-cyd-esp32-2432s028r/

from machine import Pin, SPI, ADC, idle
import os
from time import sleep

# Save this file as ili9341.py https://github.com/rdagger/micropython-ili9341/blob/master/ili9341.py
from ili9341 import Display, color565
# Save this file as xglcd_font.py https://github.com/rdagger/micropython-ili9341/blob/master/xglcd_font.py
from xglcd_font import XglcdFont

# Function to set up SPI for TFT display
display_spi = SPI(1, baudrate=60000000, sck=Pin(14), mosi=Pin(13))
# Set up display
display = Display(display_spi, dc=Pin(2), cs=Pin(15), rst=Pin(15),
                  width=320, height=240, rotation=90)

def draw_text():
    # Set colors
    white_color = color565(255, 255, 255)  # white color
    black_color = color565(0, 0, 0)        # black color

    # Turn on display backlight
    backlight = Pin(21, Pin.OUT)
    backlight.on()

    # Clear display
    display.clear(white_color)

    # Loading Unispace font
    print('Loading Unispace font...')
    unispace_font = XglcdFont('fonts/Unispace12x24.c', 12, 24)

    # Draw the text on (0, 0) coordinates (x, y, text, font,  font color, font background color,
    #                                      landscape=False, rotate_180=False, spacing=1)
    display.draw_text(0, 0, 'ESP32 says hello!', unispace_font, black_color, white_color)

    # Draw the text on the center of the display
    font_size_w = unispace_font.width
    font_size_h = unispace_font.height
    text_msg = 'Centered text'
    x_center = int((display.width-len(text_msg)*font_size_w)/2)
    y_center = int(((display.height)/2)-(font_size_h/2))
    display.draw_text(x_center, y_center, text_msg, unispace_font, black_color, white_color)

    # Draw the text with rotation
    display.draw_text(display.width-font_size_h, display.height-font_size_w, 'Text with rotation',
                      unispace_font, black_color, white_color, landscape=True)

try:
    draw_text()
except Exception as e:
    print('Error occured: ', e)
except KeyboardInterrupt:
    print('Program Interrupted by the user')
    display.cleanup()
Afficher le code brut
Comment fonctionne le code ?
Tout d’abord, vous devez charger la police souhaitée comme suit :
# Loading Unispace font
print('Loading Unispace font...')
unispace_font = XglcdFont('fonts/Unispace12x24.c', 12, 24)
La police est enregistrée dans la variable unispace_font.
Ensuite, utilisez la fonction draw_text() qui accepte la police comme quatrième argument.
# Draw the text on (0, 0) coordinates (x, y, text, font, font color, font background color,
#                                      landscape=False, rotate_180=False, spacing=1)
display.draw_text(0, 0, 'ESP32 says hello!', unispace_font, black_color, white_color)
Tester l’exemple
Exécutez le code sur votre tableau ou téléchargez-le sous main.py. Votre affichage ressemblera à l’image suivante.
 10")
Test de l’écran tactile – Code
Le code suivant teste l’écran tactile. Il détecte le toucher et imprime les coordonnées où le toucher a été détecté.
# Rui Santos & Sara Santos - Raspberryme.com
# Complete project details at https://Raspberryme.com/micropython-cheap-yellow-display-board-cyd-esp32-2432s028r/

from machine import Pin, SPI, ADC, idle
import os
from time import sleep

# Save this file as ili9341.py https://github.com/rdagger/micropython-ili9341/blob/master/ili9341.py
from ili9341 import Display, color565
# Save this file as xpt2046.py https://github.com/rdagger/micropython-ili9341/blob/master/xpt2046.py
from xpt2046 import Touch
# Save this file as xglcd_font.py https://github.com/rdagger/micropython-ili9341/blob/master/xglcd_font.py
from xglcd_font import XglcdFont

# Function to set up SPI for TFT display
display_spi = SPI(1, baudrate=60000000, sck=Pin(14), mosi=Pin(13))
# Set up display
display = Display(display_spi, dc=Pin(2), cs=Pin(15),
                  rst=Pin(15), width=320, height=240, rotation=90)

print('Display height: ' + str(display.height))
print('Display width: ' + str(display.width))

# Set colors (foreground) and background color
white_color = color565(255, 255, 255)  # white
black_color = color565(0, 0, 0)  # Black

# Turn on display backlight
backlight = Pin(21, Pin.OUT)
backlight.on()

# Clear display
display.clear(black_color)

# Initial message
# Draw the text on the center of the display
font_size = 8
text_msg = 'Touch screen to test'
x_center = int((display.width-len(text_msg)*font_size)/2)
y_center = int(((display.height)/2)-(font_size/2))

display.draw_text8x8(x_center, y_center,text_msg, white_color, black_color, 0)

# SPI for touchscreen
touchscreen_spi = SPI(2, baudrate=1000000, sck=Pin(25), mosi=Pin(32), miso=Pin(39))

def touchscreen_press(x, y):
    display.clear(black_color)
    text_touch_coordinates = "Touch: X = " + str(x) + " | Y = " + str(y)
    x_center = int((display.width-len(text_touch_coordinates)*font_size)/2)
    display.draw_text8x8(x_center, y_center, text_touch_coordinates, white_color, black_color, 0)
    print("Touch: X = " + str(x) + " | Y = " + str(y))

touchscreen = Touch(touchscreen_spi, cs=Pin(33), int_pin=Pin(36), int_handler=touchscreen_press)

try:
    # Run the event loop indefinitely
    while True:
        # Loop to wait for touchscreen press
        touchscreen.get_touch()
except Exception as e:
    print('Error occured: ', e)
except KeyboardInterrupt:
    print('Program Interrupted by the user')
finally:
    display.cleanup()
Afficher le code brut
Comment fonctionne le code ?
Tout d’abord, vous devez inclure les bibliothèques requises, y compris le xpt2046 du module Touch.
from machine import Pin, SPI, ADC, idle
import os
from time import sleep

# Save this file as ili9341.py https://github.com/rdagger/micropython-ili9341/blob/master/ili9341.py
from ili9341 import Display, color565
# Save this file as xpt2046.py https://github.com/rdagger/micropython-ili9341/blob/master/xpt2046.py
from xpt2046 import Touch
# Save this file as xglcd_font.py https://github.com/rdagger/micropython-ili9341/blob/master/xglcd_font.py
from xglcd_font import XglcdFont
Bus SPI pour l’écran tactile
Nous créons un bus SPI pour l’écran tactile. Passez en arguments les GPIO utilisés par l’écran tactile comme indiqué ci-dessous (SCK, MOSI et MISO).
touchscreen_spi = SPI(2, baudrate=1000000, sck=Pin(25), mosi=Pin(32), miso=Pin(39))Détection du toucher
Pour détecter le toucher sur l’écran tousch, vous devez créer un objet Touch et passer comme arguments le bus SPI de l’écran tactile, le CS et l’INT (broche d’interruption) et la fonction de gestionnaire d’écran tactile. Cette fonction de gestionnaire s’exécutera lorsqu’un toucher est détecté. La bibliothèque transmettra automatiquement les coordonnées x et y à cette fonction. Dans notre cas, il appellera la fonction touchscreen_press qui doit être définie précédemment.
touchscreen = Touch(touchscreen_spi, cs=Pin(33), int_pin=Pin(36), int_handler=touchscreen_press)écran tactile_press()
Cette fonction s’exécutera lorsqu’un toucher est détecté sur l’écran. Dans ce cas, nous imprimons les coordonnées tactiles sur l’écran. Vous pouvez effectuer n’importe quelle autre tâche.
def touchscreen_press(x, y):
    display.clear(black_color)
    text_touch_coordinates = "Touch: X = " + str(x) + " | Y = " + str(y)
    x_center = int((display.width-len(text_touch_coordinates)*font_size)/2)
    display.draw_text8x8(x_center, y_center, text_touch_coordinates, white_color, black_color, 0)
    print("Touch: X = " + str(x) + " | Y = " + str(y))
Continuez à détecter le contact
Pour continuer à détecter le toucher, vous devez créer une boucle while qui inclut l’instruction touchscreen.get_touch() comme suit.
try:
    # Run the event loop indefinitely
    while True:
        # Loop to wait for touchscreen press
        touchscreen.get_touch()
Tester l’exemple
Exécutez le code sur votre tableau ou téléchargez-le sous main.py. Votre affichage ressemblera à l’image suivante.
Il affichera un message dans un premier temps.
 11")
Ensuite, touchez sur l’écran. Il affichera les coordonnées touchées.
 12")
Si la carte est connectée à votre ordinateur, elle affichera également les coordonnées sur la coque.
 13")
Chargement de l’image sur l’écran – Code
Dans cette section, nous allons vous montrer comment afficher une image à l’écran. Les images ou icônes à afficher à l’écran doivent être converties en type .raw. Nous avons déjà un fichier .raw préparé pour tester l’exemple.
Cependant, si vous souhaitez afficher une image personnalisée, vous devez utiliser l’outil img2rgb565.py situé dans le dossier Library utils pour modifier les fichiers image tels que JPEG et PNG au format RGB565 brut requis.
- Cliquez ici pour télécharger le fichier MicroPython128x128.raw. Thonny IDE ne peut pas ouvrir ce genre de fichiers. Pour le télécharger sur votre tableau, vous devez suivre les instructions suivantes.
- Dans Thonny IDE, établissez une connexion avec votre carte.
- Accédez à Affichage > Fichiers. Une barre latérale gauche apparaîtra avec les fichiers sur votre ordinateur et les fichiers sur le périphérique MicroPython (ESP32).
- Parcourez votre ordinateur jusqu’à ce que vous trouviez le fichier MicroPython128x128.raw (ne changez pas le nom) ;
- Faites un clic droit sur le fichier et sélectionnez l’option « Télécharger vers / » et téléchargez-le sur votre tableau.
 14")
Après quelques secondes, le fichier image brute apparaîtra dans la liste des fichiers de votre appareil Micropython.
 15")
# Rui Santos & Sara Santos - Raspberryme.com
# Complete project details at https://Raspberryme.com/micropython-cheap-yellow-display-board-cyd-esp32-2432s028r/

from machine import Pin, SPI, ADC, idle
import os
from time import sleep

# Save this file as ili9341.py https://github.com/rdagger/micropython-ili9341/blob/master/ili9341.py
from ili9341 import Display, color565
# Save this file as xglcd_font.py https://github.com/rdagger/micropython-ili9341/blob/master/xglcd_font.py
from xglcd_font import XglcdFont

# Function to set up SPI for TFT display
display_spi = SPI(1, baudrate=60000000, sck=Pin(14), mosi=Pin(13))
# Set up display
display = Display(display_spi, dc=Pin(2), cs=Pin(15),
                  rst=Pin(15), width=320, height=240, rotation=90)

print('Display height: ' + str(display.height))
print('Display width: ' + str(display.width))

# Set colors (foreground) and background color
white_color = color565(255, 255, 255)  # white
black_color = color565(0, 0, 0)  # Black

# Turn on display backlight
backlight = Pin(21, Pin.OUT)
backlight.on()

# Clear display
display.clear(black_color)

def load_image():
    display.draw_image('MicroPython128x128.raw', 0, 0, 128, 128)

try:
    load_image()
except Exception as e:
    print('Error occured: ', e)
except KeyboardInterrupt:
    print('Program Interrupted by the user')
Afficher le code brut
Comment fonctionne le code ?
Pour afficher une image sur l’écran, il vous suffit d’appeler la fonction suivante.
def load_image():
    display.draw_image('MicroPython128x128.raw', 0, 0, 128, 128)
Il vous suffit d’appeler la fonction draw_image() sur l’objet d’affichage. Passez en arguments les coordonnées x et y où vous souhaitez afficher l’image, ainsi que la largeur et la hauteur de l’image.
Tester l’exemple
Après avoir téléchargé ou exécuté le code sur le tableau, une image s’affichera à l’écran.
 16")
Dessiner des formes sur l’écran – Code
L’exemple suivant montre comment dessiner différentes formes sur l’écran.
# Rui Santos & Sara Santos - Raspberryme.com
# Complete project details at https://Raspberryme.com/micropython-cheap-yellow-display-board-cyd-esp32-2432s028r/

from machine import Pin, SPI, ADC, idle
import os
from time import sleep

# Save this file as ili9341.py https://github.com/rdagger/micropython-ili9341/blob/master/ili9341.py
from ili9341 import Display, color565
# Save this file as xglcd_font.py https://github.com/rdagger/micropython-ili9341/blob/master/xglcd_font.py
from xglcd_font import XglcdFont

# Function to set up SPI for TFT display
display_spi = SPI(1, baudrate=60000000, sck=Pin(14), mosi=Pin(13))
# Set up display
display = Display(display_spi, dc=Pin(2), cs=Pin(15), rst=Pin(15),
                  width=320, height=240, rotation=90)

print('Display height: ' + str(display.height))
print('Display width: ' + str(display.width))

# Set colors (foreground) and background color
white_color = color565(255, 255, 255)  # white
black_color = color565(0, 0, 0)  # Black

# Turn on display backlight
backlight = Pin(21, Pin.OUT)
backlight.on()

# Clear display
display.clear(black_color)

def draw_shapes():
    display.draw_hline(10, 40, 70, color565(255, 0, 255))
    sleep(1)

    display.draw_vline(10, 0, 40, color565(0, 255, 255))
    sleep(1)

    display.fill_hrect(23, 50, 30, 75, color565(255, 255, 255))
    sleep(1)

    display.draw_hline(0, 0, 100, color565(255, 0, 0))
    sleep(1)

    display.draw_line(50, 0, 64, 40, color565(255, 255, 0))
    sleep(2)

    display.clear()

    coords = [[0, 63], [78, 80], [122, 92], [50, 50], [78, 15], [0, 63]]
    display.draw_lines(coords, color565(0, 255, 255))
    sleep(1)

    display.clear()
    display.fill_polygon(7, 120, 120, 100, color565(0, 255, 0))
    sleep(1)

    display.fill_rectangle(0, 0, 15, 227, color565(255, 0, 0))
    sleep(1)

    display.clear()

    display.fill_rectangle(0, 0, 163, 163, color565(128, 128, 255))
    sleep(1)

    display.draw_rectangle(0, 64, 163, 163, color565(255, 0, 255))
    sleep(1)

    display.fill_rectangle(64, 0, 163, 163, color565(128, 0, 255))
    sleep(1)

    display.draw_polygon(3, 120, 110, 30, color565(0, 64, 255), rotate=15)
    sleep(3)

    display.clear()

    display.fill_circle(132, 132, 70, color565(0, 255, 0))
    sleep(1)

    display.draw_circle(132, 96, 70, color565(0, 0, 255))
    sleep(1)

    display.fill_ellipse(96, 96, 30, 16, color565(255, 0, 0))
    sleep(1)

    display.draw_ellipse(96, 85, 16, 30, color565(255, 255, 0))

    sleep(5)
    display.cleanup()

try:
    draw_shapes()
except Exception as e:
    print('Error occured: ', e)
except KeyboardInterrupt:
    print('Program Interrupted by the user')
finally:
    display.cleanup()
Afficher le code brut
Après avoir initialisé l’affichage, nous appliquons différentes méthodes sur l’objet d’affichage pour afficher différentes formes. Les noms des méthodes sont explicites.
def draw_shapes():
    display.draw_hline(10, 40, 70, color565(255, 0, 255))
    sleep(1)

    display.draw_vline(10, 0, 40, color565(0, 255, 255))
    sleep(1)

    display.fill_hrect(23, 50, 30, 75, color565(255, 255, 255))
    sleep(1)

    display.draw_hline(0, 0, 100, color565(255, 0, 0))
    sleep(1)

    display.draw_line(50, 0, 64, 40, color565(255, 255, 0))
    sleep(2)

    display.clear()

    coords = [[0, 63], [78, 80], [122, 92], [50, 50], [78, 15], [0, 63]]
    display.draw_lines(coords, color565(0, 255, 255))
    sleep(1)

    display.clear()
    display.fill_polygon(7, 120, 120, 100, color565(0, 255, 0))
    sleep(1)

    display.fill_rectangle(0, 0, 15, 227, color565(255, 0, 0))
    sleep(1)

    (...)
Tester l’exemple
Cet exemple affichera plusieurs formes à l’écran et avec des couleurs différentes.
 17")
 18")
Contrôler la LED RVB intégrée – Code
La carte ESP32 CYD est livrée avec une LED RVB qui peut être utile pour le débogage. Dans cette section, vous apprendrez comment contrôler cette LED RBG.
 19")
Voici le brochage des LED RVB :
| LED RVB | GPIO |
| LED rouge | GPIO4 |
| LED verte | GPIO16 |
| LED bleue | GPIO17 |
Le brochage et l’emplacement de la LED peuvent être différents selon le modèle de votre carte.
Important : les LED RGB fonctionnent en logique inversée car elles sont actives faible. Cela signifie que si vous les réglez sur HIGH = OFF et LOW = ON.
Les exemples suivants allument la LED RVB dans différentes couleurs : rouge, vert et bleu.
# Rui Santos & Sara Santos - Raspberryme.com
# Complete project details at https://Raspberryme.com/micropython-cheap-yellow-display-board-cyd-esp32-2432s028r/

from machine import Pin
import os
from time import sleep

# RGB LED at the back
red_led = Pin(4, Pin.OUT)
green_led = Pin(16, Pin.OUT)
blue_led = Pin(17, Pin.OUT)

# Turn on all LEDs (they are active low, so they work with inverted logic)
# Example: red_led.on() command turns the red LED off
red_led.on()
green_led.on()
blue_led.on()
sleep(3)

red_led.off()
sleep(3)

red_led.on()
green_led.off()
sleep(3)

green_led.on()
blue_led.off()
sleep(3)

blue_led.on()
Afficher le code brut
Comment fonctionne le code ?
Tout d’abord, nous créons des variables pour faire référence aux LED.
red_led = Pin(4, Pin.OUT)
green_led = Pin(16, Pin.OUT)
blue_led = Pin(17, Pin.OUT)
Ensuite, on éteint toutes les LED (ces LED fonctionnent en logique inversée).
red_led.on()
green_led.on()
blue_led.on()
Ensuite, utilisez la commande off() pour allumer une certaine LED et la commande on() pour éteindre une LED spécifique.
red_led.off()
sleep(3)

red_led.on()
green_led.off()
sleep(3)

green_led.on()
blue_led.off()
sleep(3)

blue_led.on()
Lire le LDR embarqué – Code
La carte CYD est livrée avec un LDR à l’avant, juste à côté de l’écran. Le LDR est connecté au GPIO 34.
 20")
Pour lire la valeur du LDR, il vous suffit de lire le signal analogique sur le GPIO 34.
# Rui Santos & Sara Santos - Raspberryme.com
# Complete project details at https://Raspberryme.com/micropython-cheap-yellow-display-board-cyd-esp32-2432s028r/

from machine import Pin, ADC
import os
from time import sleep

try:
    # Run the event loop indefinitely
    while True:
        # Read light sensor
        lightsensor = ADC(34, atten=ADC.ATTN_0DB)
        print('LDR value: ' + str(lightsensor.read_uv()))
        sleep(1)
except Exception as e:
    print('Error occured: ', e)
except KeyboardInterrupt:
    print('Program Interrupted by the user')
Afficher le code brut
Lecture recommandée : Lectures analogiques ESP32/ESP8266 avec MicroPython.
Remarque : sur de nombreuses cartes CYD, le LDR ne fonctionnera pas comme prévu sans modifier le circuit interne. Donc, si vous obtenez la même valeur quelle que soit la luminosité, il se peut que le LDR de votre carte ne fonctionne pas correctement.
Conclusion
Ce didacticiel était un guide de démarrage rapide pour la carte ESP32 CYD (Cheap Yellow Display) avec MicroPython. Nous avons abordé l’affichage du texte, des images et des formes, ainsi que la manière de contrôler la LED RVB et de lire les valeurs du LDR.
Ce didacticiel doit également être compatible avec d’autres écrans TFT en définissant le bon brochage et les bonnes dimensions dans le code.
Si vous préférez utiliser Arduino IDE à la place, consultez ce guide pour la carte CYD avec Arduino IDE.
Si vous souhaitez en savoir plus sur Micropython avec la carte ESP32, consultez nos ressources :
Merci d’avoir lu.
Plongez dans l’histoire de Raspberry Pi avec cette vidéo :
-
 APKLVSR ESP32 ESP32-2432S028R Écran tactile résistif 2,8" ESP32-2432S028R Module d'affichage LCD TFT 240 x 320, carte de développement ESP32 avec WiFi Bluetooth, pour Arduino IDE (2 pièces)
 -
 ELECROW Écran Tactile ESP32 800 × 480, écran Tactile LCD TFT HMI ESP32 RVB 7", processeur LX6 Dual-Core 32 Bits, jusqu'à 240 MHz, Compatible avec Arduino, LVGL, PlatformIO, MicroPython (sans boîtier