



/*
Features:
- Reads acceleration and gyroscope data from an MPU6050 sensor.
- Uses a Kalman filter to smooth and correct sensor readings.
- Reads ambient light levels using an LDR sensor.
- Communicates sensor data wirelessly via Bluetooth.
- Sends processed values over serial for debugging.
Applications:
- Motion tracking and gesture recognition.
- Balancing robots and stabilization systems.
- Smart lighting systems based on ambient light levels.
- Wearable motion analysis and health tracking.
- Wireless remote control based on tilt movements.
*/
#include
#include
#include
#include "BluetoothSerial.h"
Adafruit_MPU6050 mpu;  // Create MPU6050 sensor object
BluetoothSerial SerialBT;  // Create Bluetooth serial object
const int LDRSensor = 34;  // Define the LDR sensor pin
// Kalman filter variables
float x_angle = 0, y_angle = 0; // Filtered angle estimates
float x_bias = 0, y_bias = 0;   // Gyroscope bias correction
float P[2][2] = { { 1, 0 }, { 0, 1 } };  // Error covariance matrix
// Kalman filter tuning parameters
// Adjust these for different levels of noise filtering and responsiveness
// Quick and Less Smooth Response
float q_angle = 0.01;    // Trust new angle estimates more
float q_bias = 0.01;     // Faster correction of gyroscope drift
float r_measure = 0.01;  // Trust sensor readings more (less smoothing)
// // Alternative: Optimum Response
// const float q_angle = 0.001; // Process noise
// const float q_bias = 0.003;
// const float r_measure = 0.03; // Measurement noise
// // Alternative: Slow and smooth response
// float q_angle = 0.0001;   // Trust new angle estimates more
// float q_bias = 0.0005;    // Faster correction of gyroscope drift
// float r_measure = 0.05;   // Trust sensor readings more (less smoothing)
void setup() {
Serial.begin(115200);  // Initialize Serial Monitor
SerialBT.begin("ESP32_BT");  // Initialize Bluetooth with device name "ESP32_BT"
// Initialize MPU6050 sensor
if (!mpu.begin()) {
  Serial.println("MPU6050 not found!");
  while (1) delay(10);  // Halt execution if MPU6050 is not detected
}
// Set MPU6050 configuration
mpu.setAccelerometerRange(MPU6050_RANGE_8_G);  // Set accelerometer range
mpu.setGyroRange(MPU6050_RANGE_500_DEG);       // Set gyroscope range
mpu.setFilterBandwidth(MPU6050_BAND_10_HZ);    // Apply a low-pass filter
delay(100);  // Allow settings to take effect
}
// Kalman filter function to smooth sensor data
float kalmanFilter(float newAngle, float newRate, float dt, float &angle, float &bias) {
float rate = newRate - bias;  // Remove bias from gyroscope rate
angle += dt * rate;  // Estimate new angle
// Update estimation error covariance
P[0][0] += dt * (dt * P[1][1] - P[0][1] - P[1][0] + q_angle);
P[0][1] -= dt * P[1][1];
P[1][0] -= dt * P[1][1];
P[1][1] += q_bias * dt;
// Compute Kalman gain
float S = P[0][0] + r_measure;
float K[2] = { P[0][0] / S, P[1][0] / S };
// Update estimates with measurement
float y = newAngle - angle;
angle += K[0] * y;
bias += K[1] * y;
// Update error covariance matrix
P[0][0] -= K[0] * P[0][0];
P[0][1] -= K[0] * P[0][1];
P[1][0] -= K[1] * P[0][0];
P[1][1] -= K[1] * P[0][1];
return angle;  // Return the filtered angle
}
void loop() {
sensors_event_t a, g, temp;  // Variables to store sensor readings
mpu.getEvent(&a, &g, &temp); // Get sensor data
int ldrValue = analogRead(LDRSensor);  // Read LDR sensor value
int outputValue = (ldrValue < 2000) ? 0 : 1;  // Determine light or dark condition
// Calculate time difference for Kalman filter
static unsigned long prevTime = millis();
float dt = (millis() - prevTime) / 1000.0;  // Convert to seconds
prevTime = millis();
// Apply Kalman filter to smooth sensor data
float filteredX = kalmanFilter(a.acceleration.x, g.gyro.x, dt, x_angle, x_bias);
float filteredY = kalmanFilter(a.acceleration.y, g.gyro.y, dt, y_angle, y_bias);
// Format data for Bluetooth transmission
String btData = String(filteredX, 2) + "," + String(filteredY, 2) + "," + String(outputValue);
// Send data over Bluetooth and Serial for debugging
SerialBT.println(btData);
Serial.println(btData);
// Small delay to stabilize loop execution
// delay(1); // Uncomment if needed
}

git clone https://github.com/jobitjoseph/crazyflie-clients-python.git
cd crazyflie-clients-python
pip3 install -e .import time
import cflib.crtp
from cflib.crazyflie import Crazyflie
import serial
# URI for your LiteWing drone
DRONE_URI = "udp://192.168.43.42"# Connect to serial port
#ser = serial.Serial('/dev/cu.usbserial-0001', 115200, timeout=1) #use for serial wire connection
ser = serial.Serial("/dev/tty.ESP32_BT", baudrate=9600, timeout=1) #use for bluetooth connection
print("Connected to BT")# Initialize CRTP drivers
cflib.crtp.init_drivers()
# Create Crazyflie instance
cf = Crazyflie()
# Connect to the drone
print("Connecting to drone...")
cf.open_link(DRONE_URI)
print("Connected to drone. Waiting for stability...")
time.sleep(1.0) # Wait after connection
# First send zero setpoint to unlock safety
print("Sending zero setpoint to unlock safety...")
cf.commander.send_setpoint(0, 0, 0, 0)
time.sleep(0.1)
cf.param.set_value('commander.enHighLevel', '1')
print("High-level commander activated")while True:
try:
# Read a line of data
line = ser.readline().decode('utf-8').strip()
# Check if there's data
if line:
# Split the data and extract values
values = line.split(',')
# Clean the values before converting to float
# This removes any duplicate decimal points
clean_x = values[0].replace('0.0', '0.', 1) if '0.0' in values[0] else values[0]
clean_y = values[1].replace('0.0', '0.', 1) if '0.0' in values[1] else values[1]
trigger = values[2]
if trigger == "0":
cf.commander.send_setpoint(0, 0, 0, 0)
ser.reset_input_buffer()
print("waiting for trigger")
if trigger == "1":
gyroX = float(clean_x)
gyroY = float(clean_y)
# Map gyroX and gyroY (-5 to +5) to vx and vy (-0.5 to +0.5)
vx = round(gyroX / 10.0, 1) # Rounded to 1 decimal place
vy = -round(gyroY / 10.0, 1) # Rounded to 1 decimal place
# Print only gyroX and gyroY
print(vx, vy, trigger)
cf.commander.send_hover_setpoint(vx, vy, 0, 0.5)
except:
# Skip any problematic lines
pass 

Projets utilisant le contrôle des gestes


Bras robotique contrôlé à la main à l’aide d’Arduino Nano
Apprenez à créer un bras robotique contrôlé par un geste de main en utilisant Arduino Nano, un gyroscope MPU6050 et un capteur flexible. Ce projet vous permet de manipuler le mouvement et la pince d’un bras robotique imprimé en 3D, imitant les gestes de la main humaine pour un contrôle précis.
Robot de contrôle des appareils intelligents basés sur les gestes
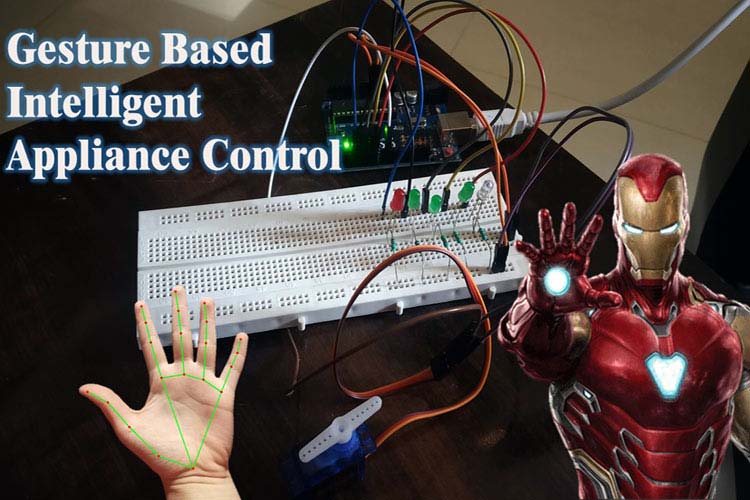
Explorez comment la reconnaissance des gestes de la main alimentée par AI peut être utilisée pour contrôler les appareils électroménagers, de l’ajustement de l’éclairage et de la vitesse du ventilateur aux bouchons de porte. Inspiré par Jarvis d’Iron Man, ce projet rend la domotique intelligente plus accessible, en particulier pour ceux qui ont une mobilité limitée.
Retrouvez l’histoire de Raspberry Pi dans cette vidéo :
-
 Drone avec caméra 4K UHD pour adultes et débutants, 84 min de vol (3 batteries), portée 800 m, moteur sans balais, maintien d’altitude automatique, suivi auto, WiFi FPV, quadcoptère pliable
 -
 Drone avec caméra HD 1080P pour enfants et adultes, télécommande avec écran 2,4 pouces, carte SD 32 Go avec lecteur de cartes, jouet pour garçon et fille, cadeau de Noël